New Process Page
In the new Release 47.0, the Process Page is updated to improve the user experience and interface. The main goals were to make the Process Page more intuitive and to allow a better focus on the areas where the user is spending most of his/her time.
Process Page Header
The Process Page Header is less busy. When hovering over the different tabs a light blue square will appear. The icons and font size for the tabs are smaller making them less busy. The increased white pace makes them more readable.
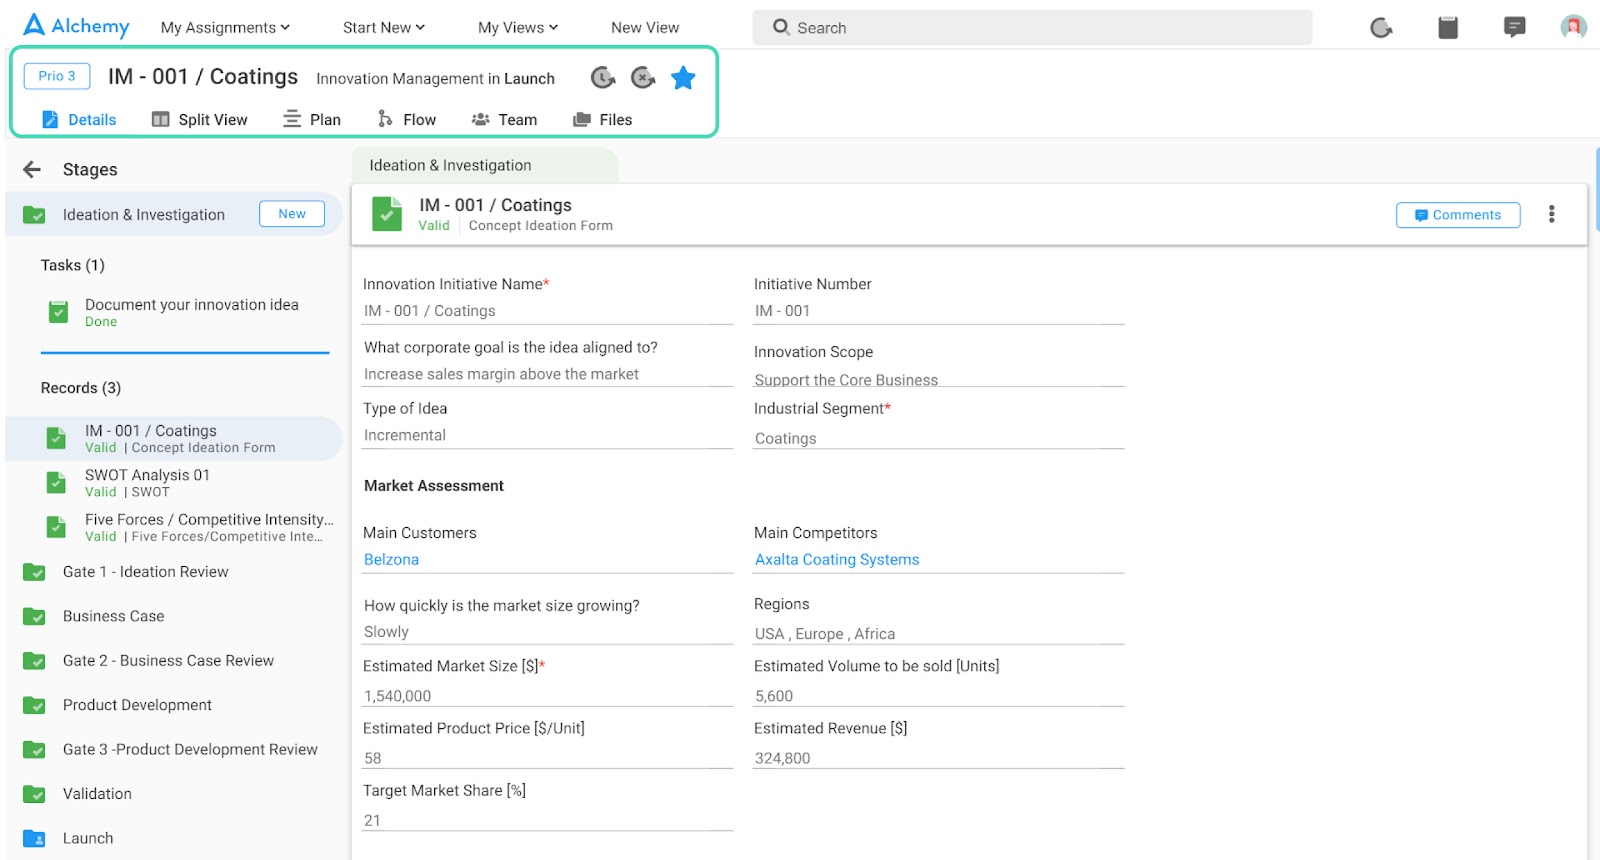
Left Navigation Panel
The left navigation panel icons have been simplified and the font is a bit smaller for better clarity. Only one stage can be open at a time. When you enter the Process, if you are assigned to the active stage, that stage will be opened. If you are not assigned to the active Stage in the Process, the first Stage of the Process will be opened.
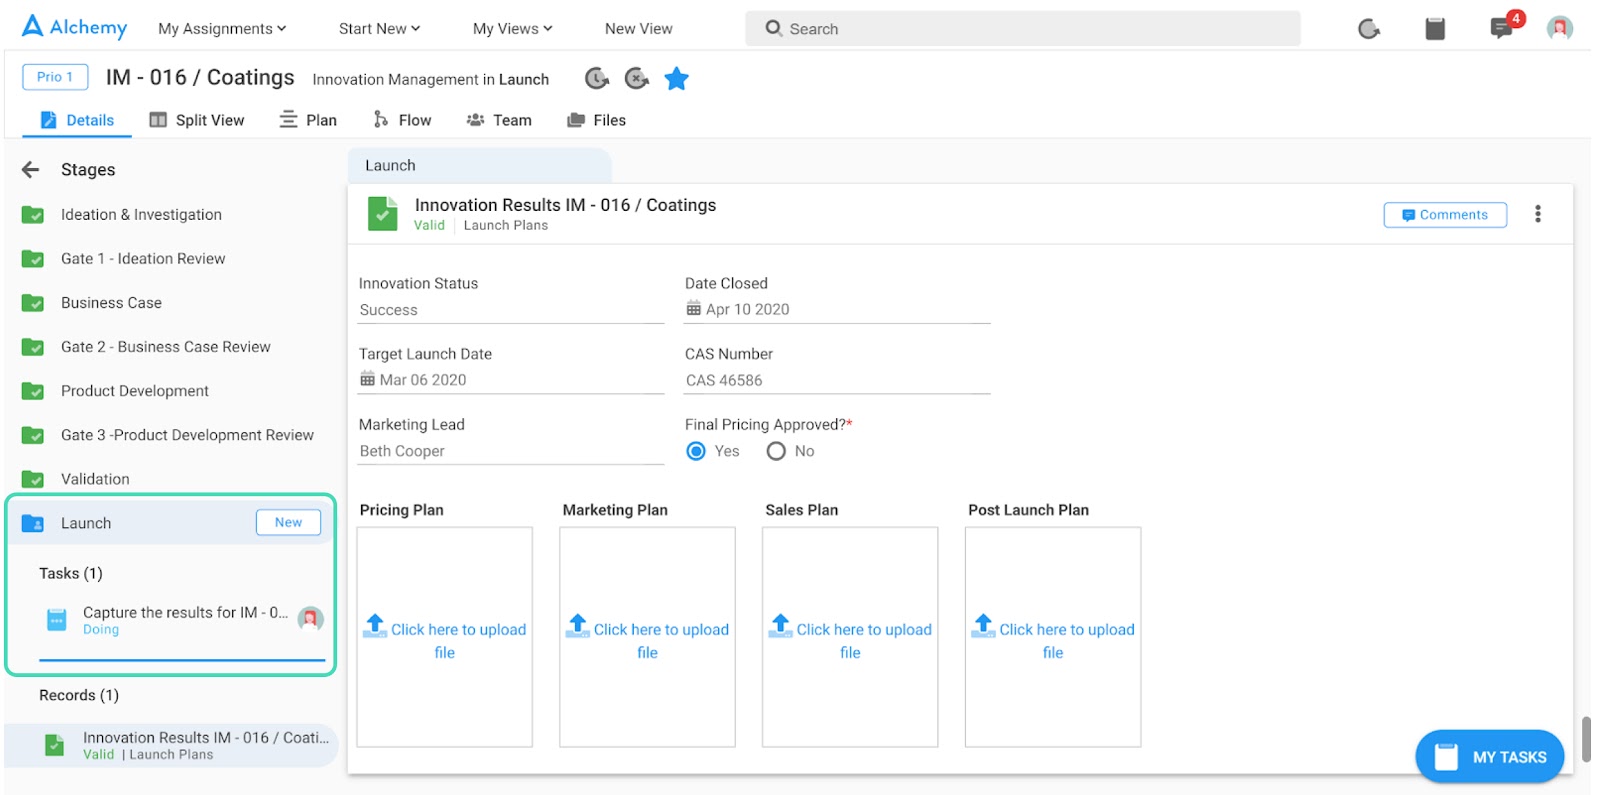
Inside each of the stages, you still have access to the Tasks and Records sections providing information about all the Tasks and Records that are in that stage. Some additional information for Tasks and Records is available now. For Tasks, the information about the Task state is visible (i.e., To Do/Doing/Done/Pending/Overdue). For Records, information about the Record state is visible (i.e., Valid/Invalid) as well as information about in which Record Template that Record was created (e.g., Launch Plans in the example).
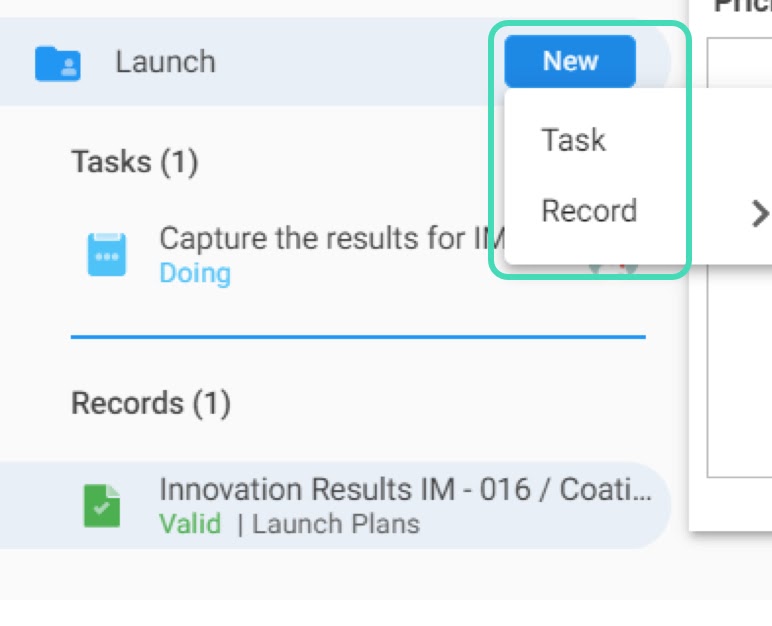
The 'New Task' and 'New Record' buttons have been replaced with a single 'New' button. From this button, you have the opportunity to create either a new Task or a new Record if your system was configured to allow you to do this.
Tasks & My tasks
When you enter into a Process from My Assignments or any other reference link, the Task area will not be automatically opened. It will stay hidden until you choose to click on the Task subject from the navigation panel.
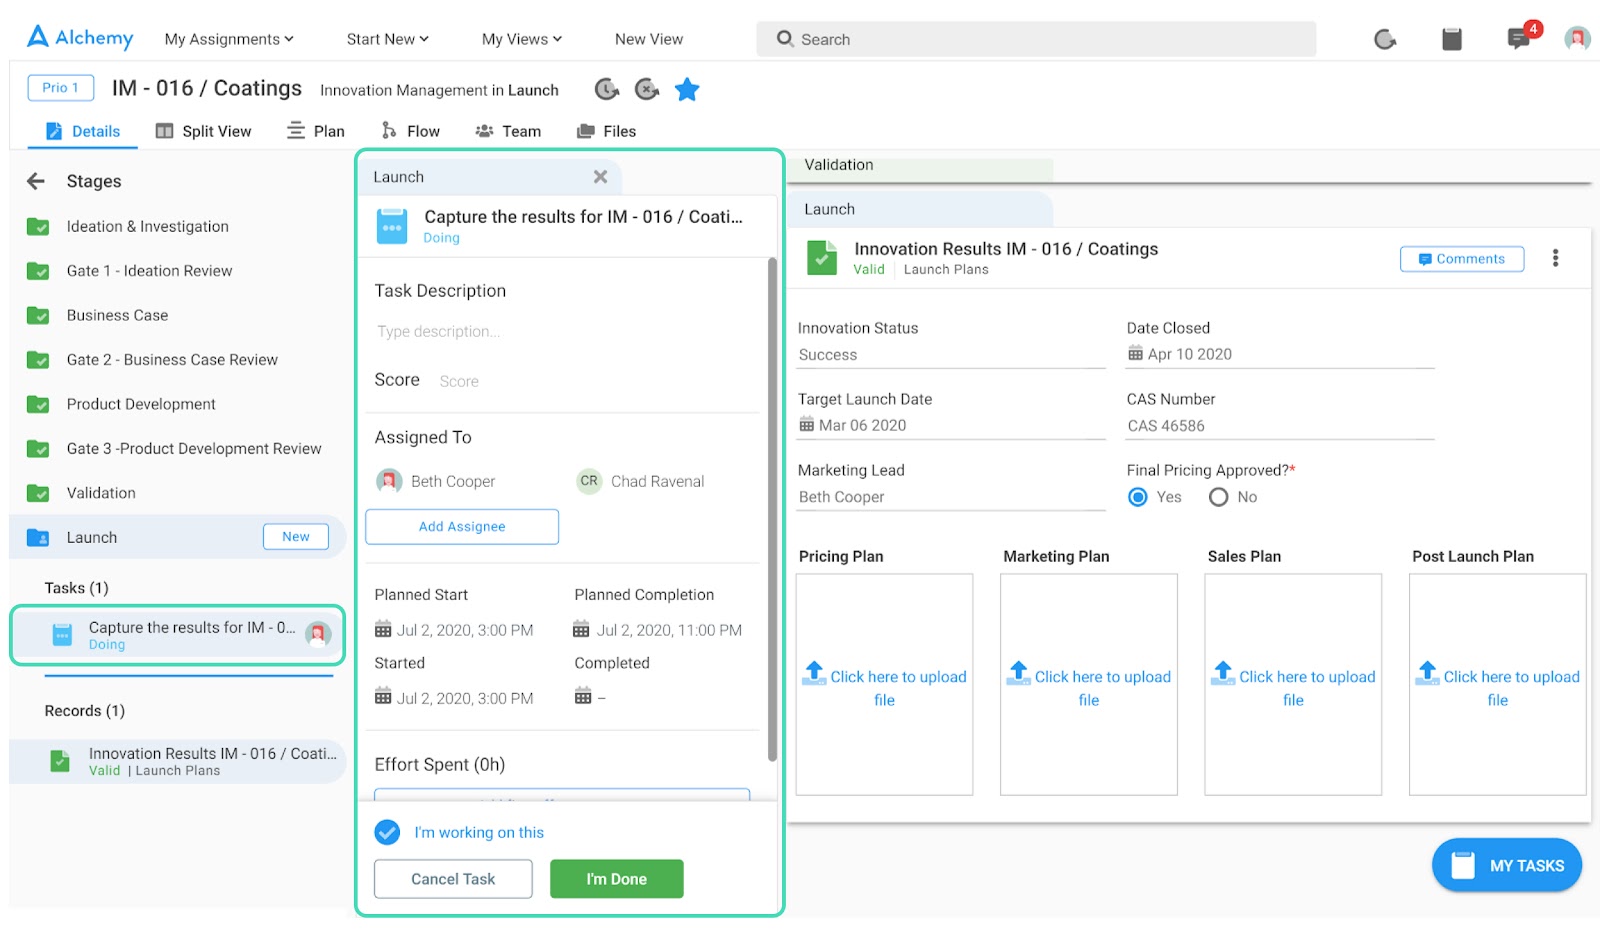
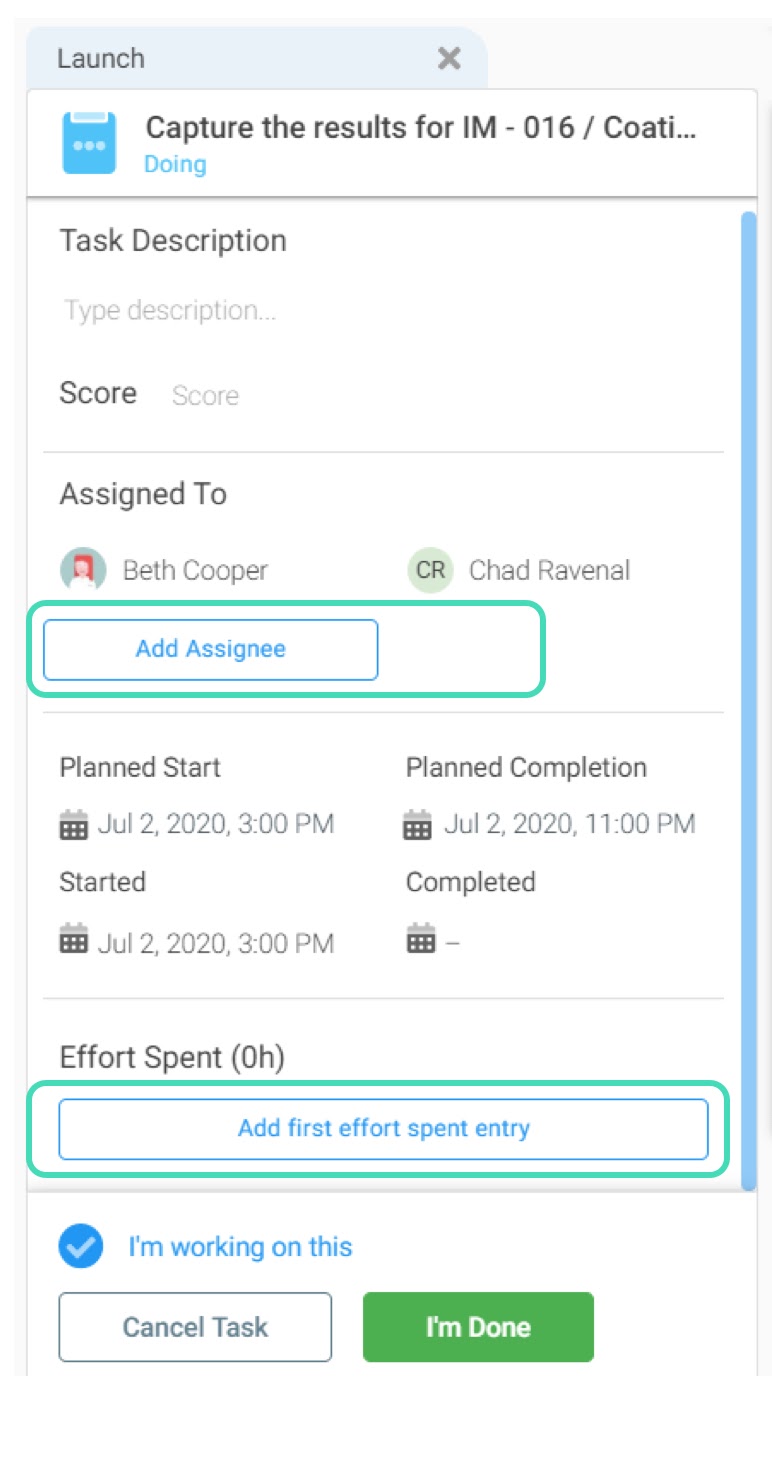
In the Task section at the top left corner, you can see the name of the stage where that Task belongs. It's represented as a folder tab. By clicking the 'x' on the top right corner you can hide the Task again. The controls for Task status changes are moved to the bottom. Some style changes have also been incorporated (e.g., there are buttons for Add Assignee and Effort Spent).
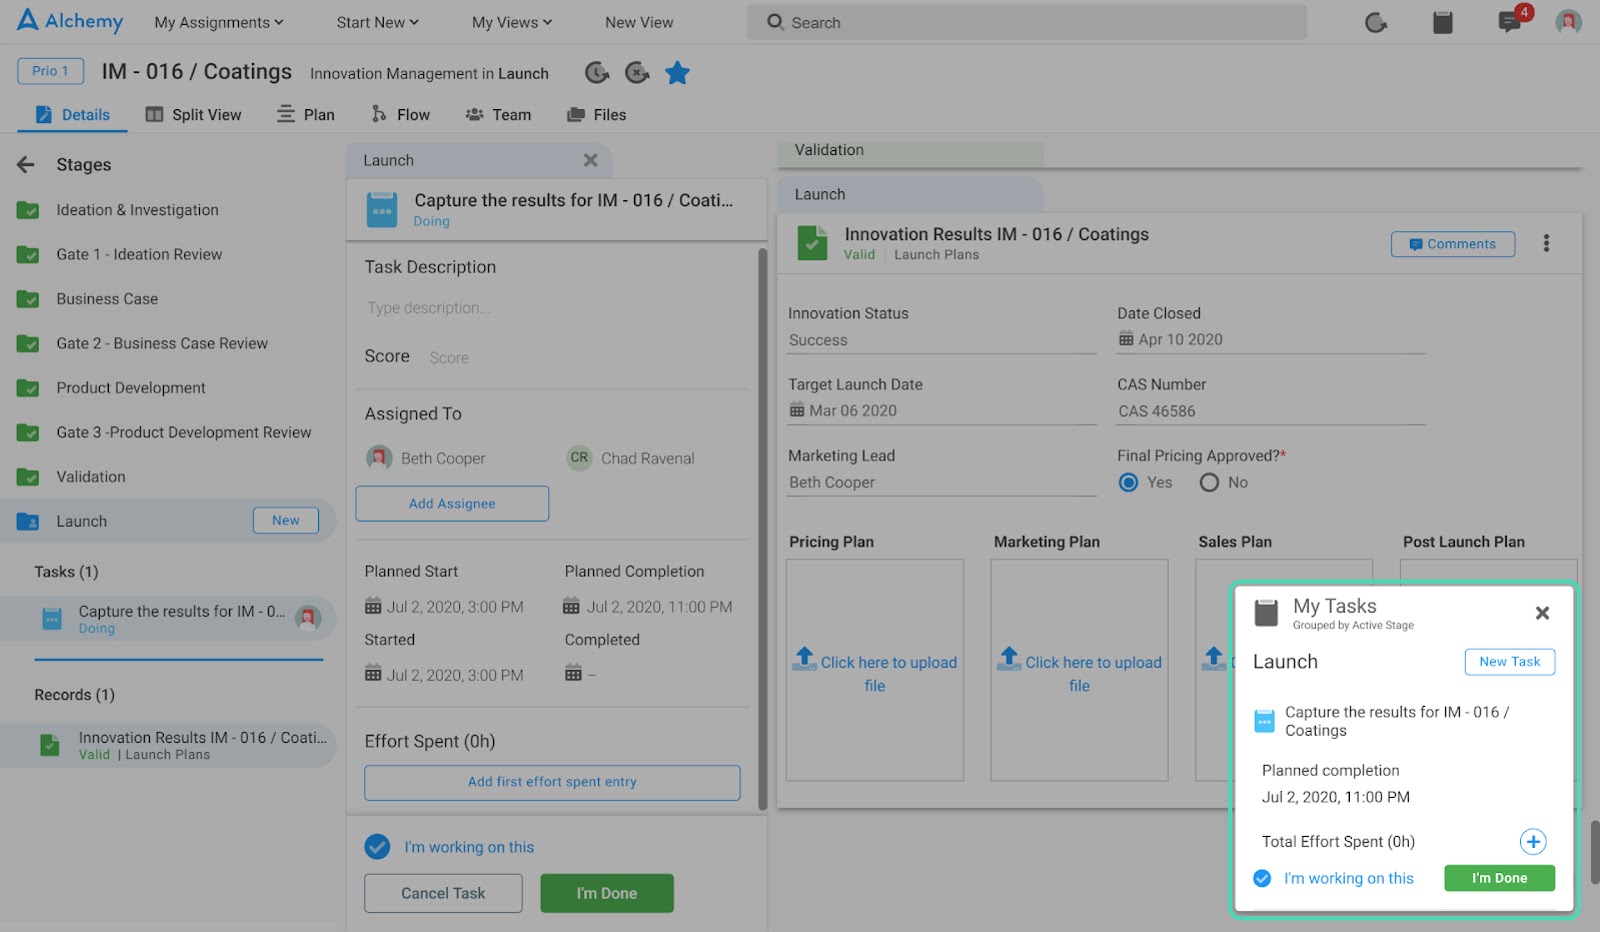
Additionally in the lower right corner, you can see a blue "MY TASKS" control button. By clicking on it, all Tasks that are assigned to you on that stage will become visible.
You can access the Task and log Task data easily without taking up much visual real estate. From this section a couple of actions can be performed:
- A new Task can be added,
- Effort Spent can be added for the current date (by clicking on the plus icon, entering the effort and clicking on the check icon) and the Total Effort Spent can be viewed
- Task status can be changed, hence the stage can be completed.
Finally, the Task title in the MY TASKS pop up is a link. You can click it to open the full Task middle panel.
Records
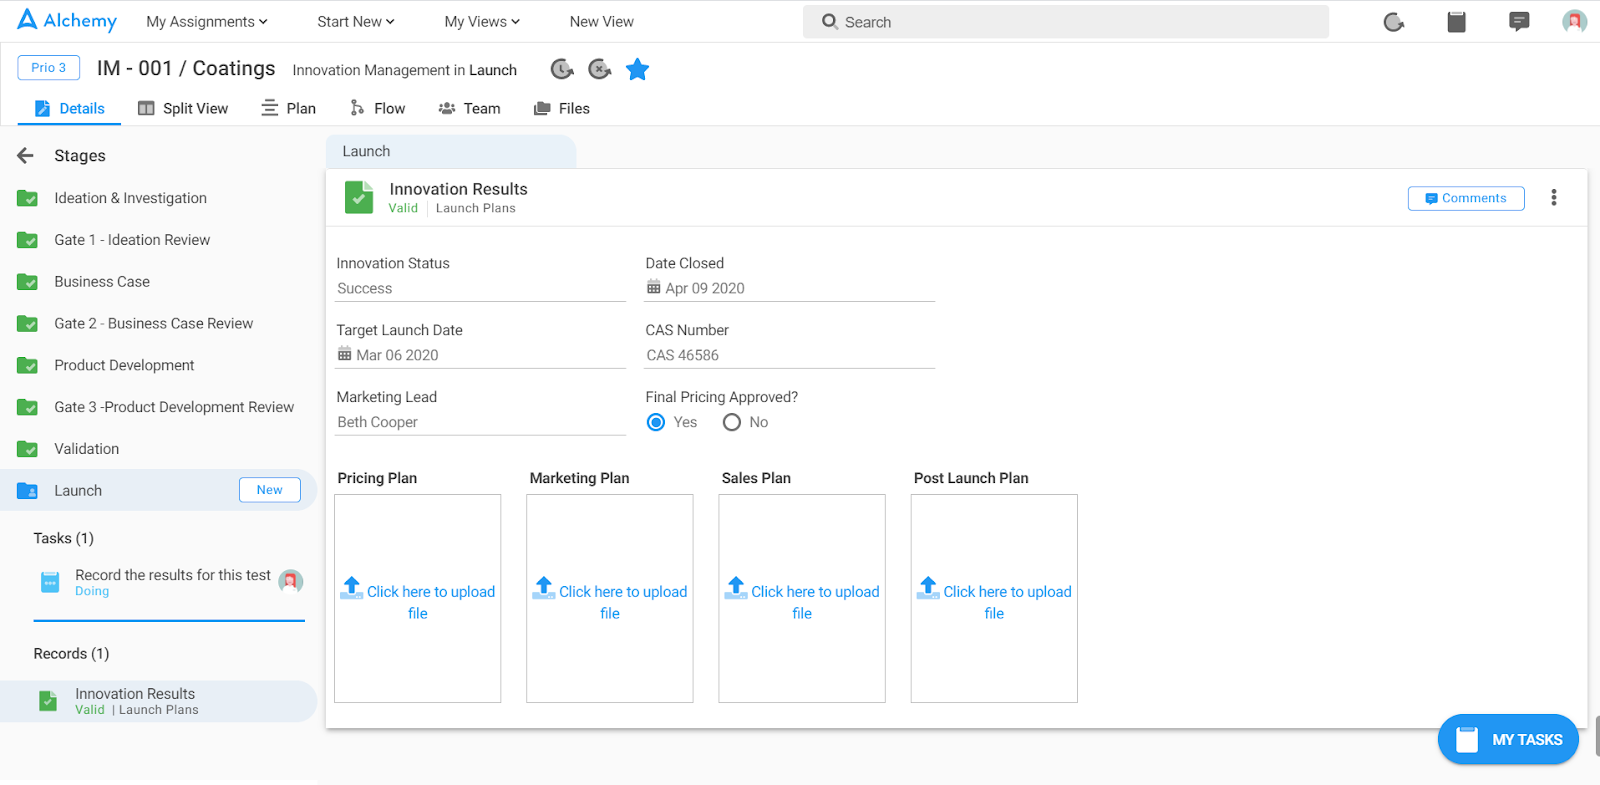
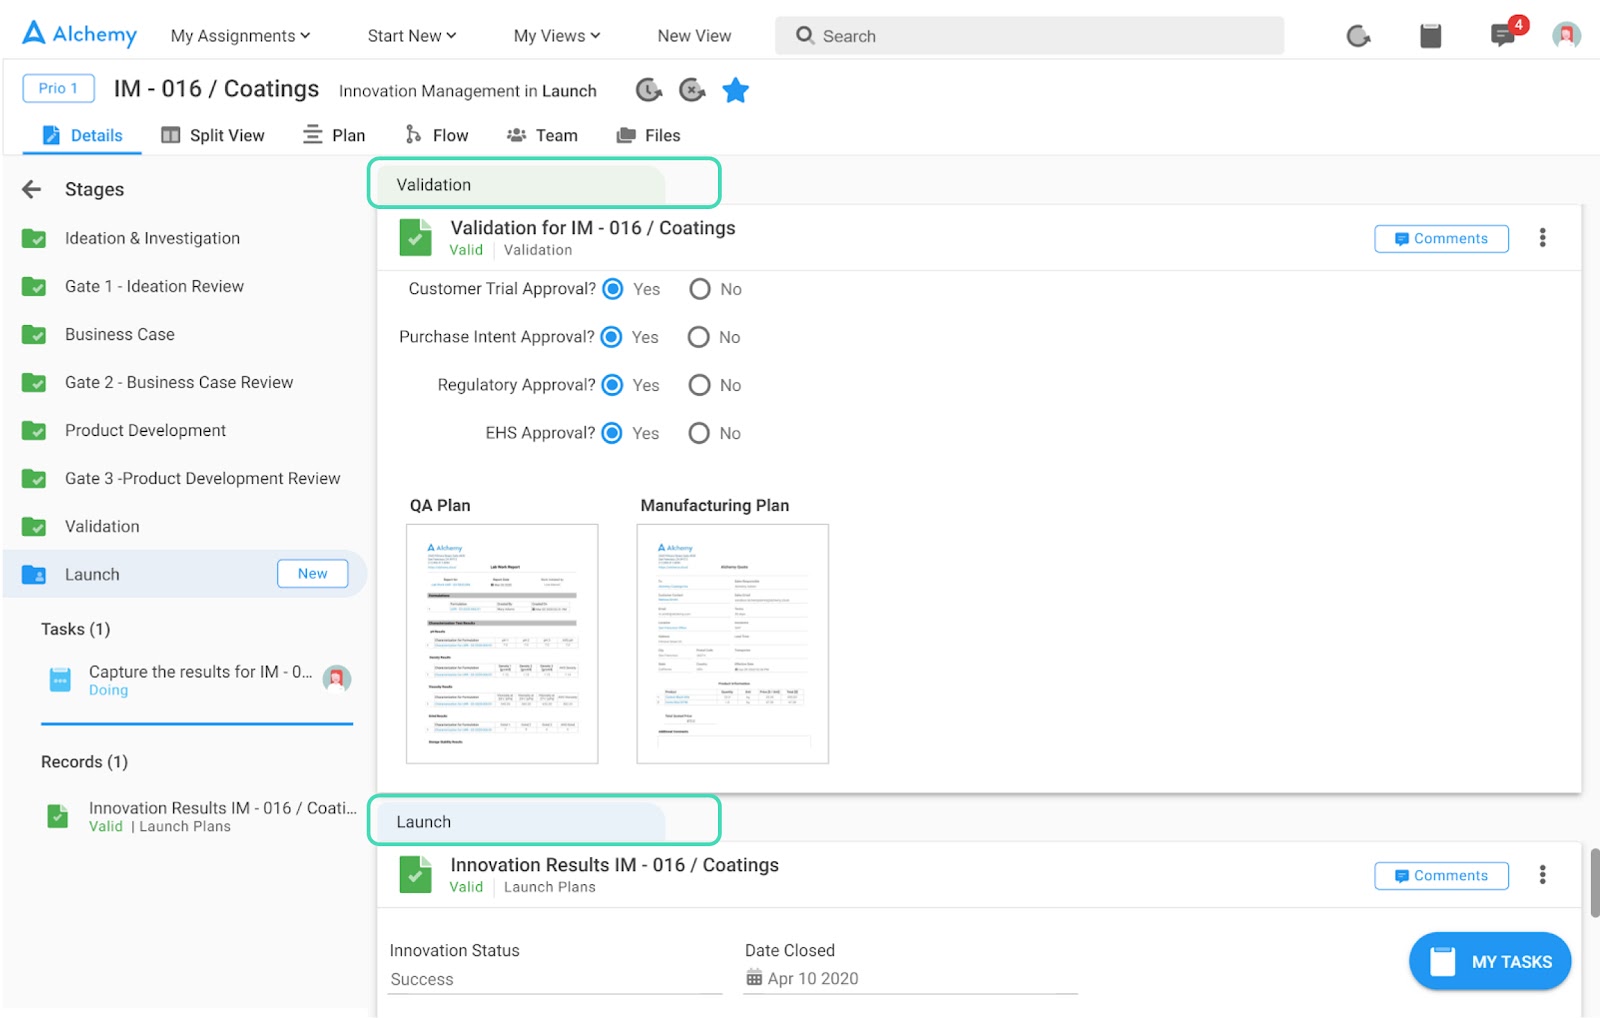
Each Record now has a label in the upper left corner that displays the Stage where the record was generated and can be located. These labels look like folder tabs to enable better navigation of Records. First, they highlight in which Stage the Record is located. Second, based on the color, the user can tell whether the stage is completed or active. In the screenshot below, the Validation stage is light green which signifies that the stage is complete and the Launch stage is light blue which signifies that the Stage is active.
Comments
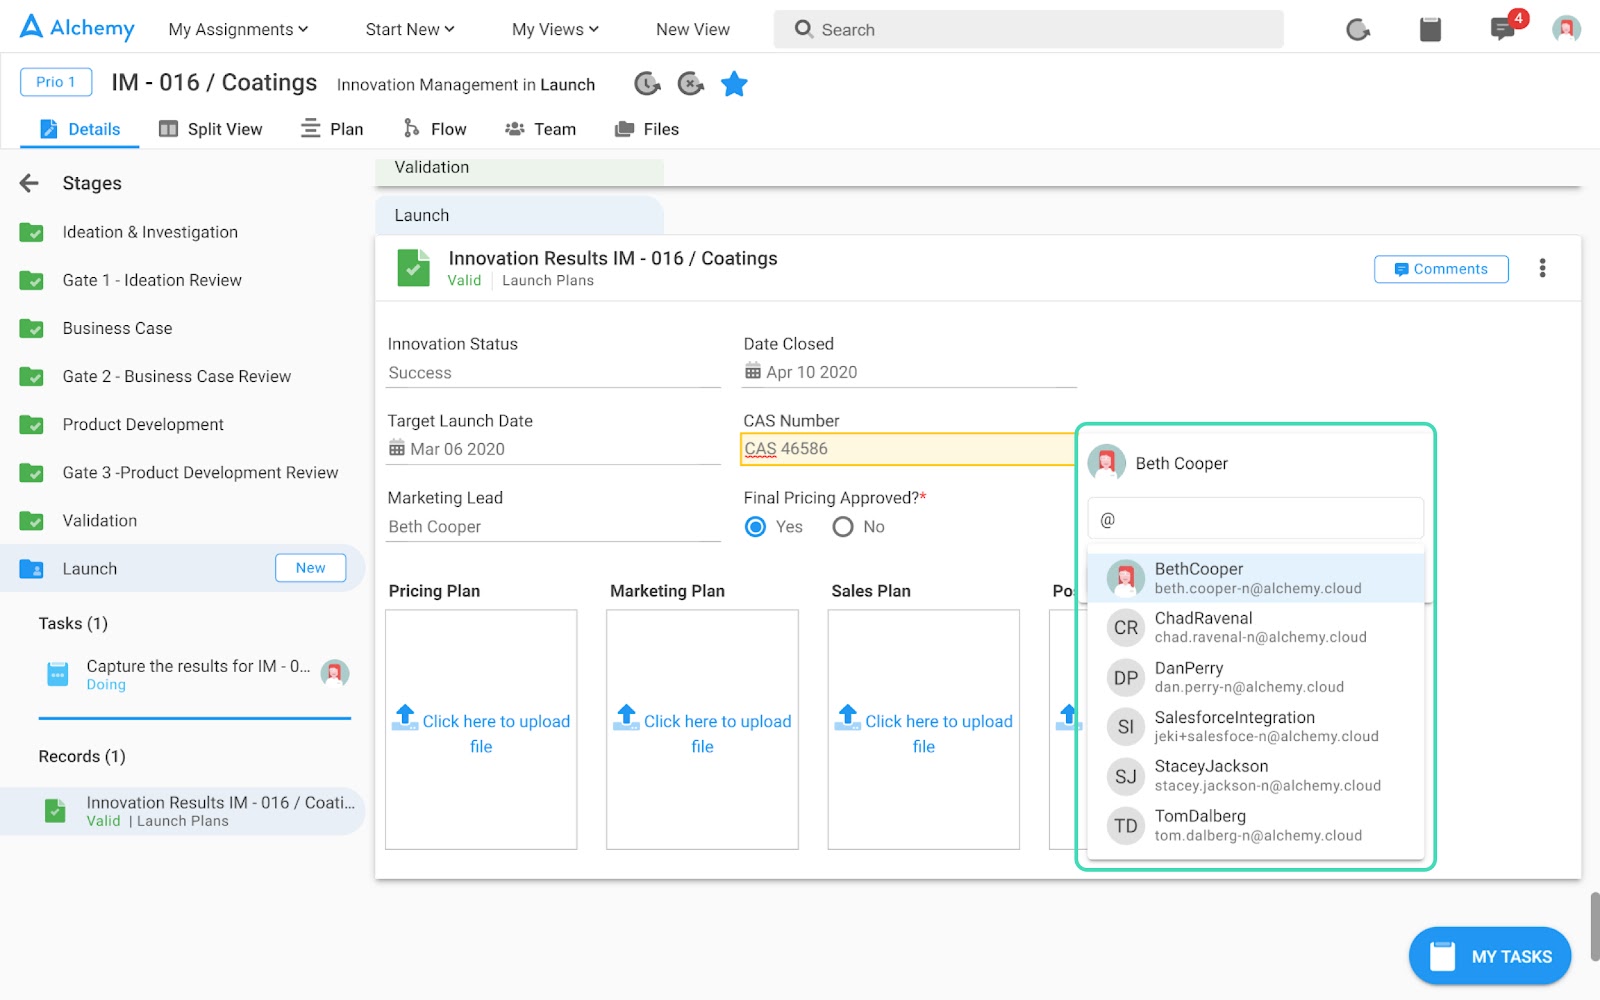
In this Release, enhanced Collaboration features have been introduced. On every Record, users can now leave comments on any of the fields. By right-clicking on the field, a dropdown will appear. In the screenshot below, the CAS # field is selected and the user has right-clicked on it opening the comments popup.
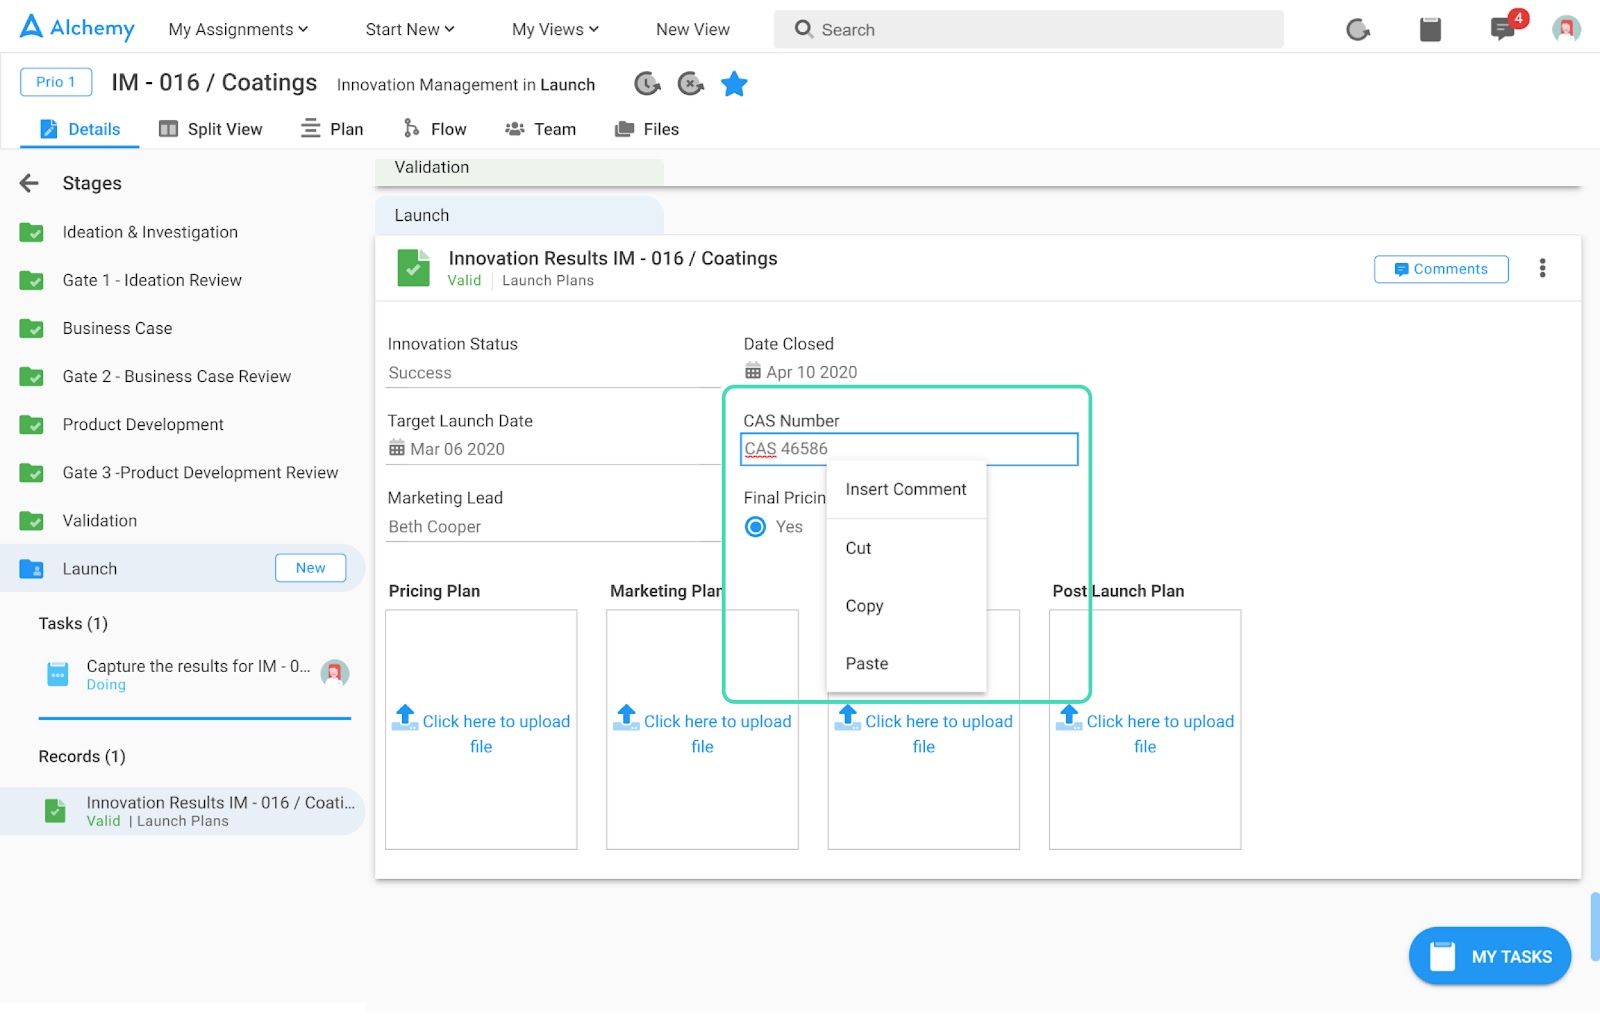
If you select 'Insert Comment' the field will get a light yellow highlight with a pop up for entering your comment.
In this comment section, you can @mention or +mention a fellow Alchemy user and he/she will get a notification that you've left him/her a comment. All users with at least view rights can leave comments.
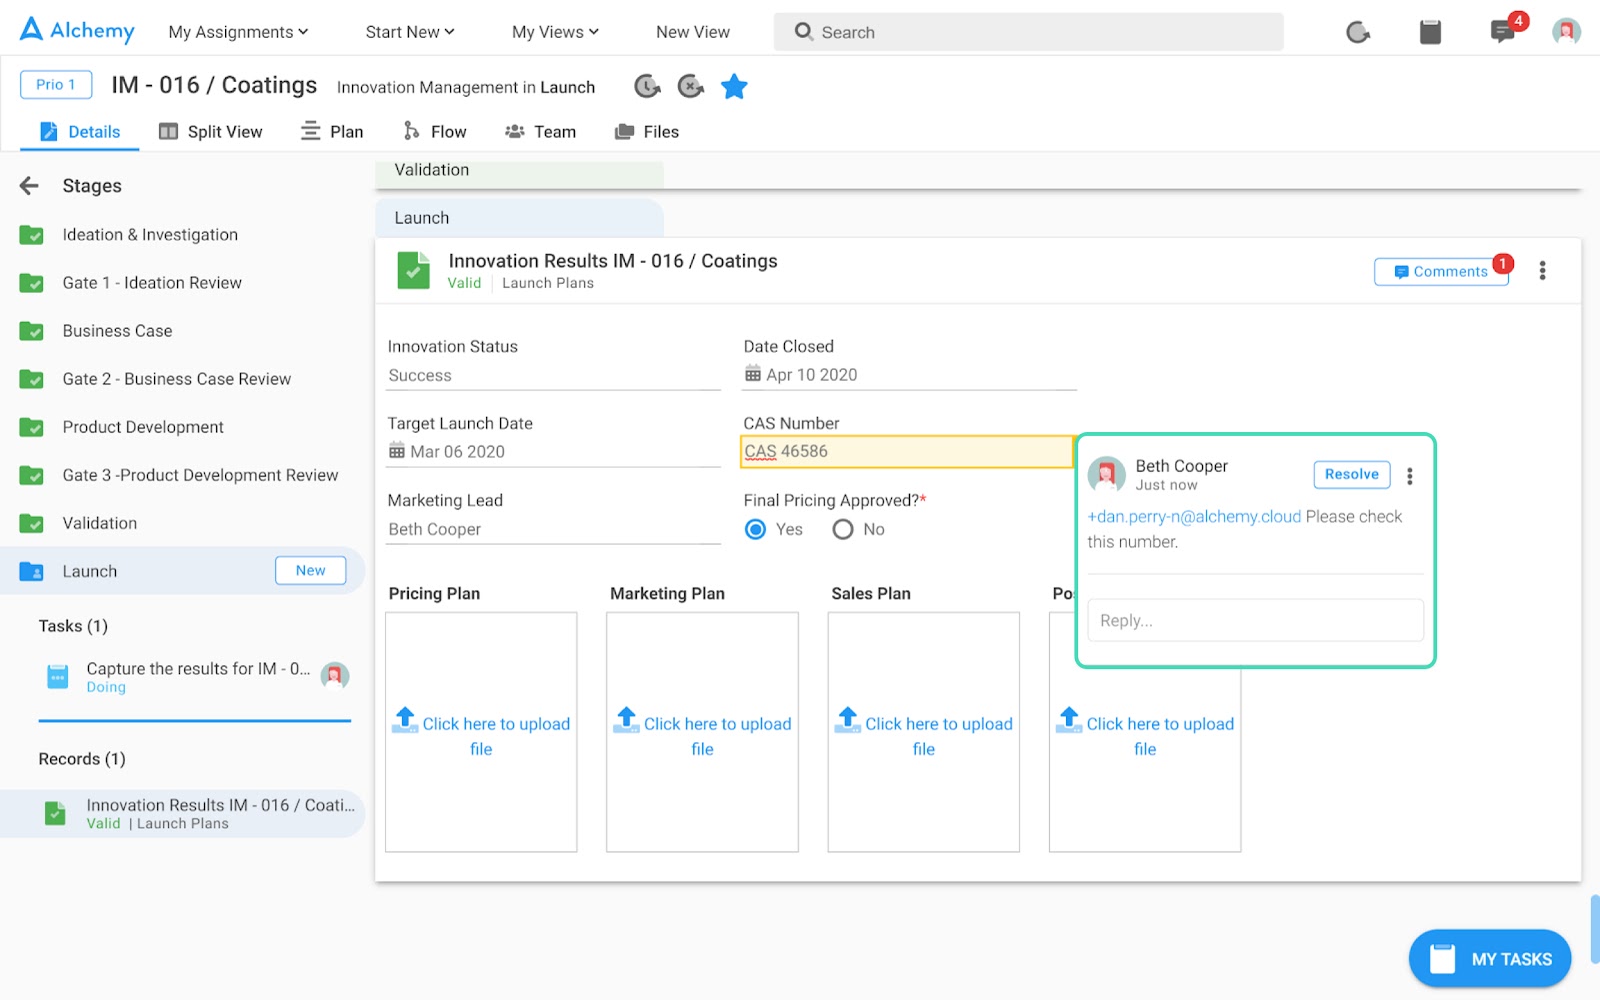
Immediately in the upper right corner of the Record, the Comments button will have a red dot with a number inside that indicates the number of unresolved Comments in that record.
By clicking on this Comments button, the list of all Comments is visible in chronological order.
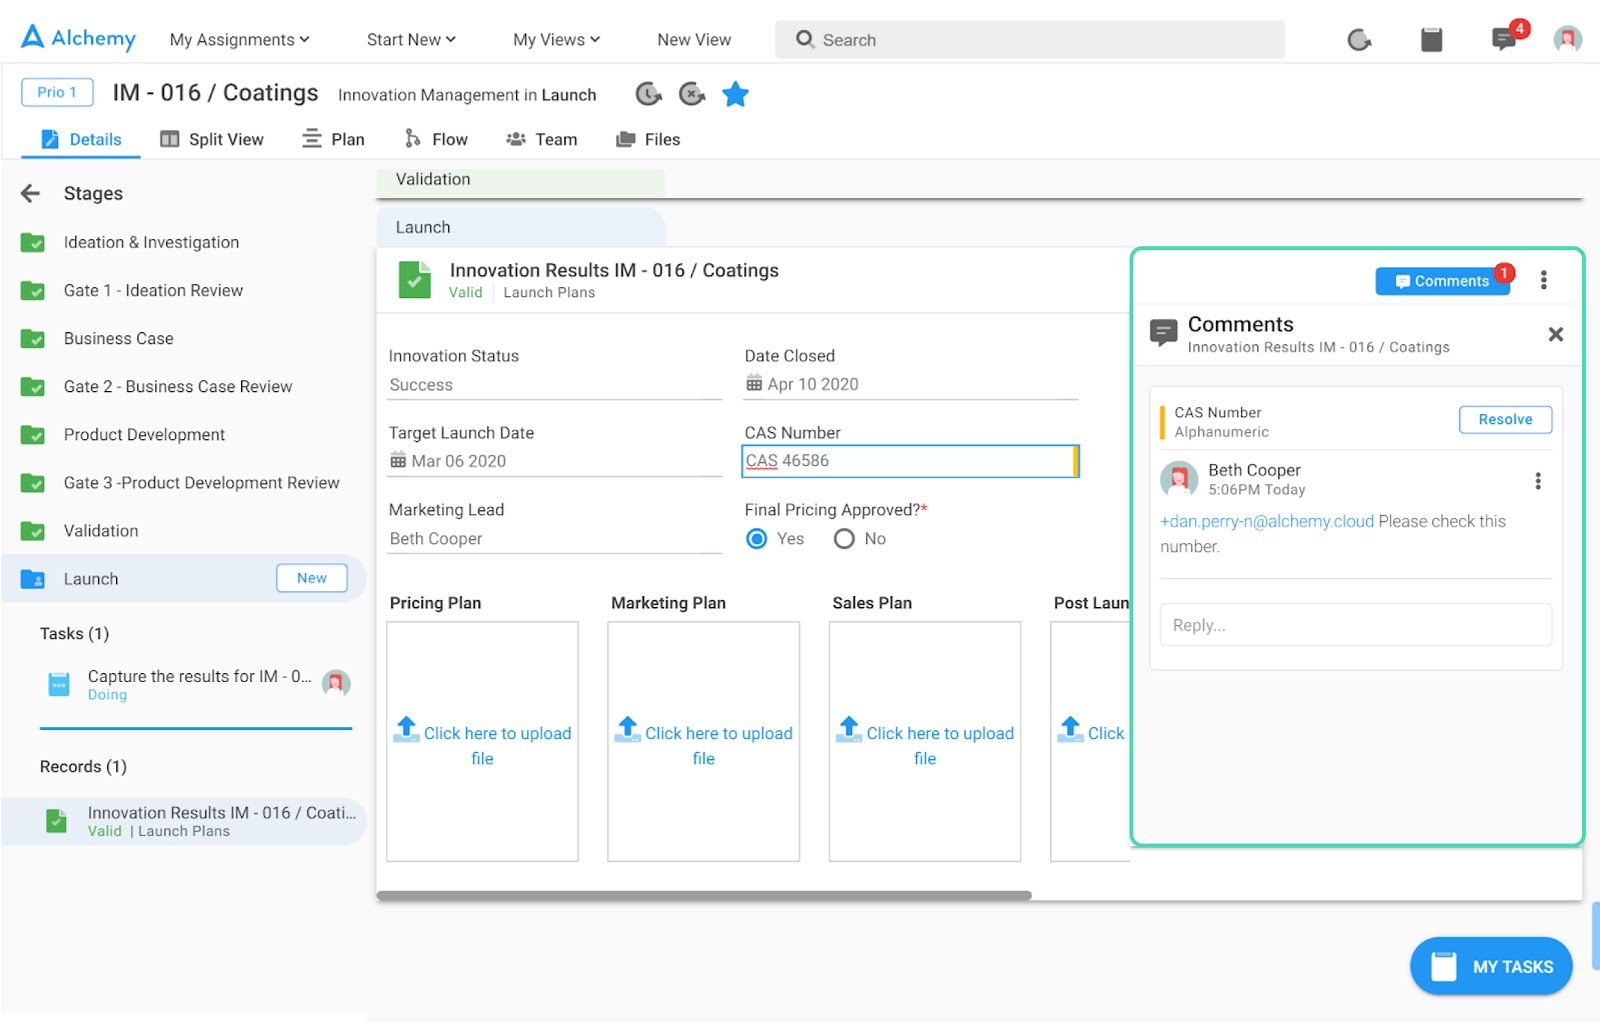
Comments can be Resolved and Re-Opened. Fields with active (unresolved) Comments are visually marked in yellow, so you can easily identify in which Fields there are comments. Specifically, when you move away from the Field with the Comment, you will notice a yellow highlight line on the right side of the field visually indicating that there are one or more Comments on that field.
Notifications
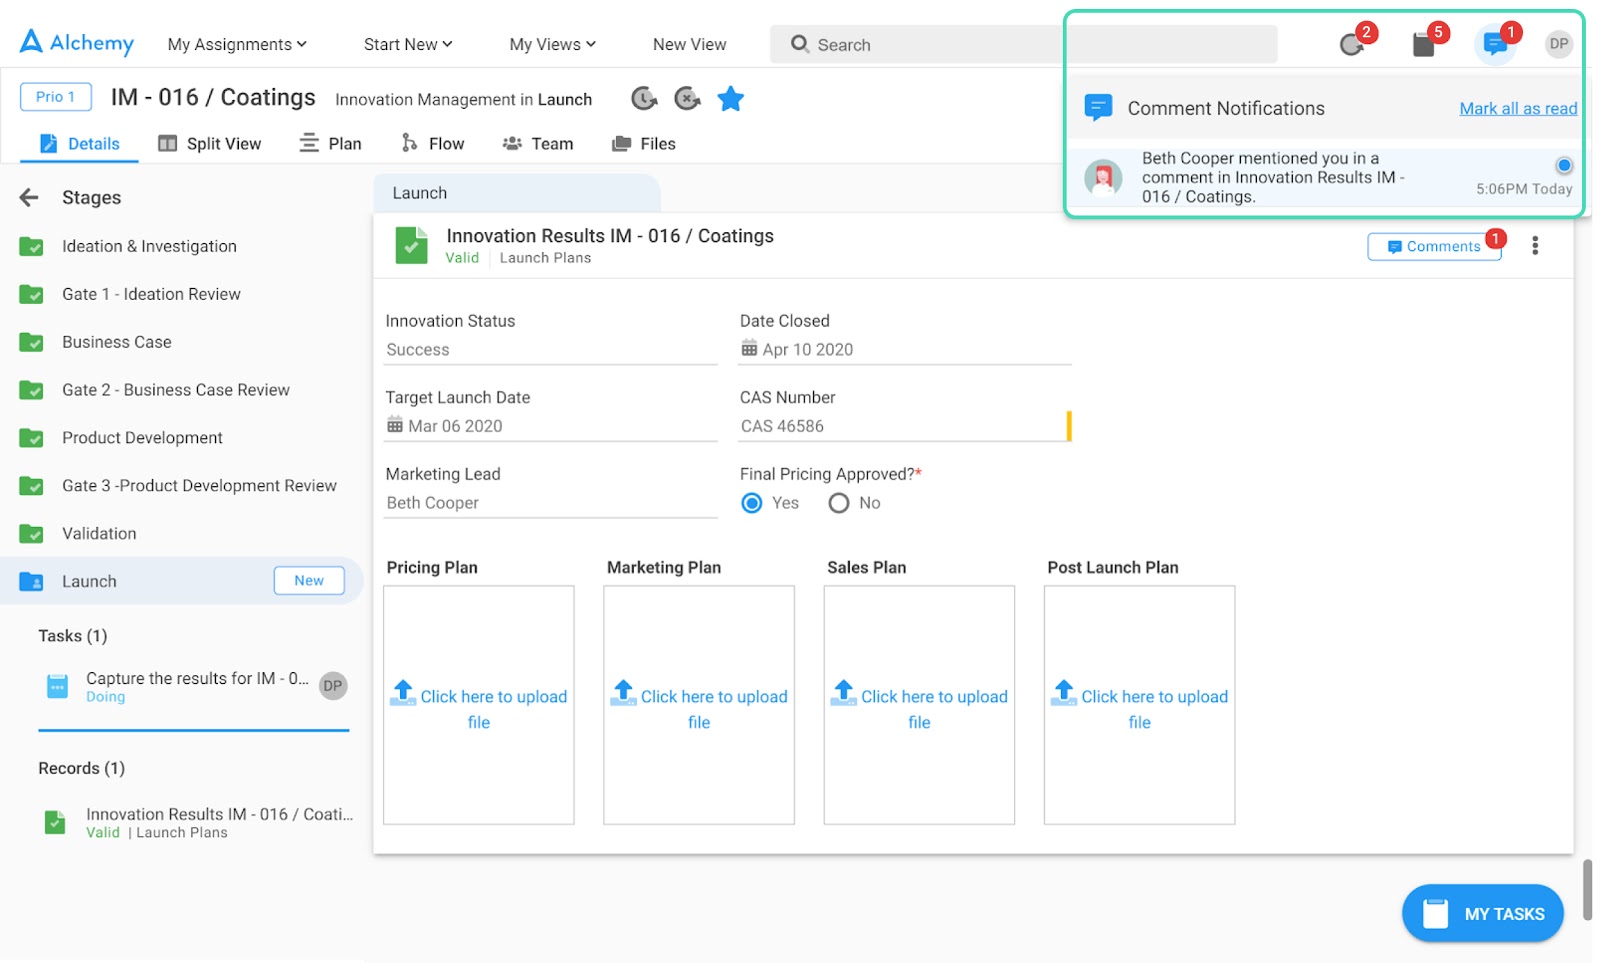
The former Notifications bell icon has been replaced with 3, more specific Notifications icons. From the right after your user profile initials or image:
- The Comment Notifications icon is represented by a text bubble
- The Task Notifications icon is represented by the Task icon similar to the left navigation
- The Process Notifications icon is represented by the circular Process arrow similar to the one in the main Process header

Comment Notifications
We grouped all Comments-related Notifications, so you can easily see and access each category of Notifications as distinct from other categories of Notifications.
A Comment Notification is triggered by an @ mention or + mention. The system notifies the person mentioned instead of you having to do it and everyone can see a time-stamped history of Comments to facilitate digital collaboration.
Task Notifications
We grouped all Task-related Notifications, so you can easily see and access those as distinct from other types of Notifications.
A Task Notification is automatically triggered by the assignment of a Task by another user or by the system to drive process efficiency.

Process Notifications
We grouped all Process-related Notifications, so you can easily see and access those as distinct from other types of Notifications.
A Process Notification is automatically generated by the system at appropriate or designated steps in the workflow.

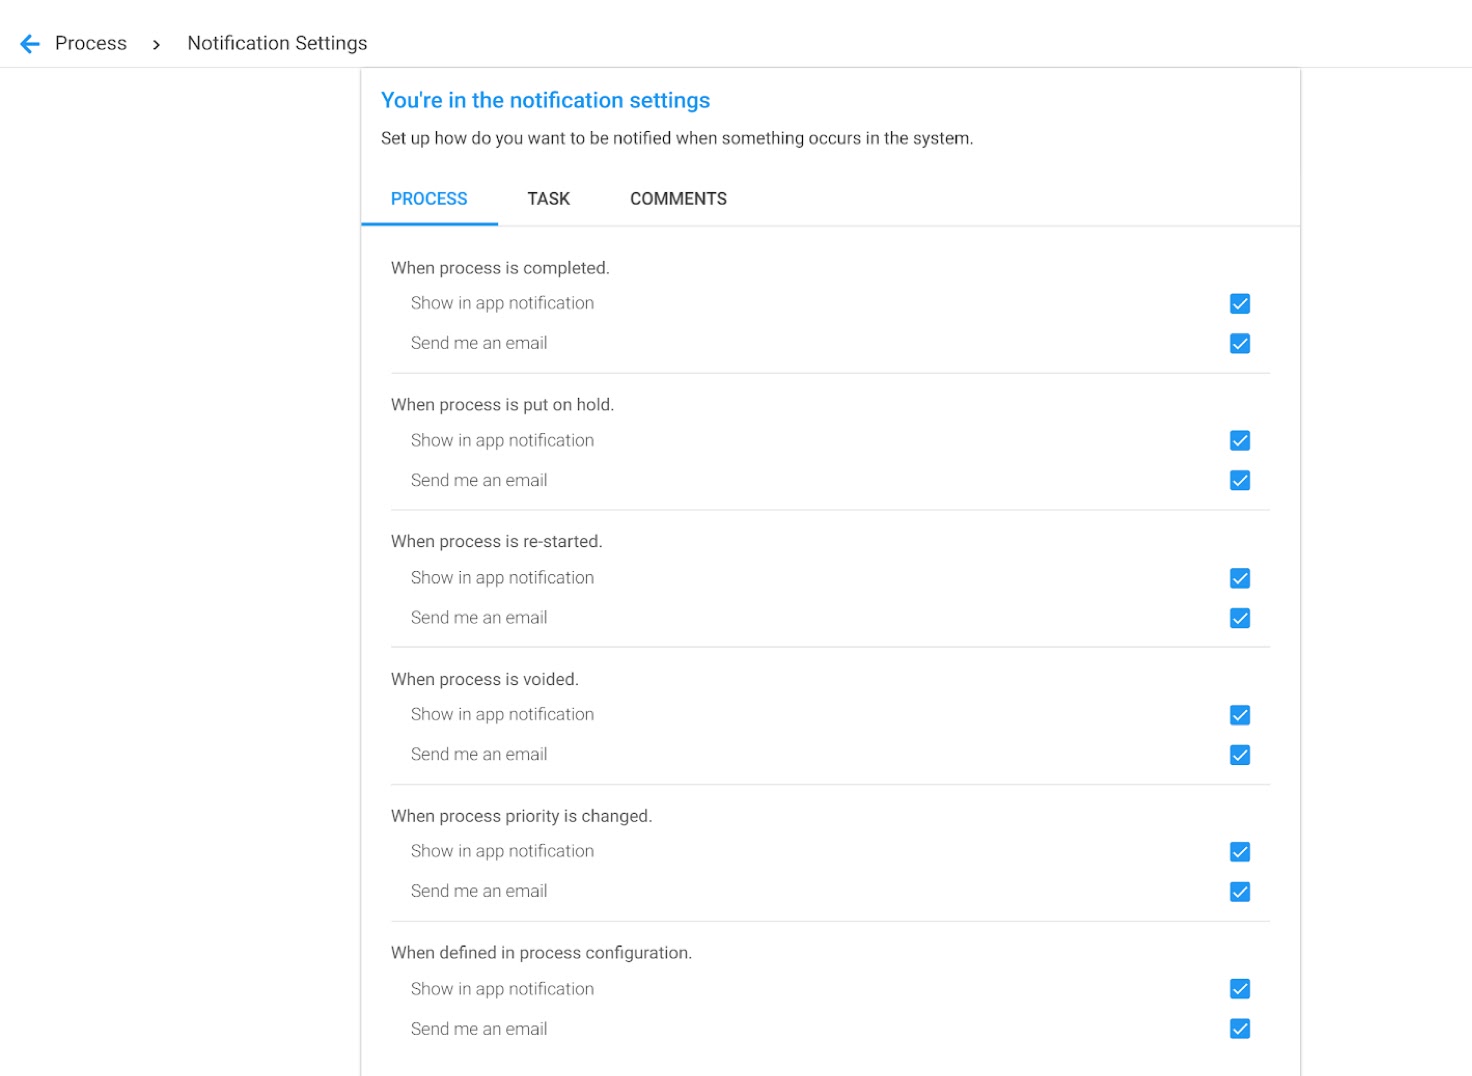
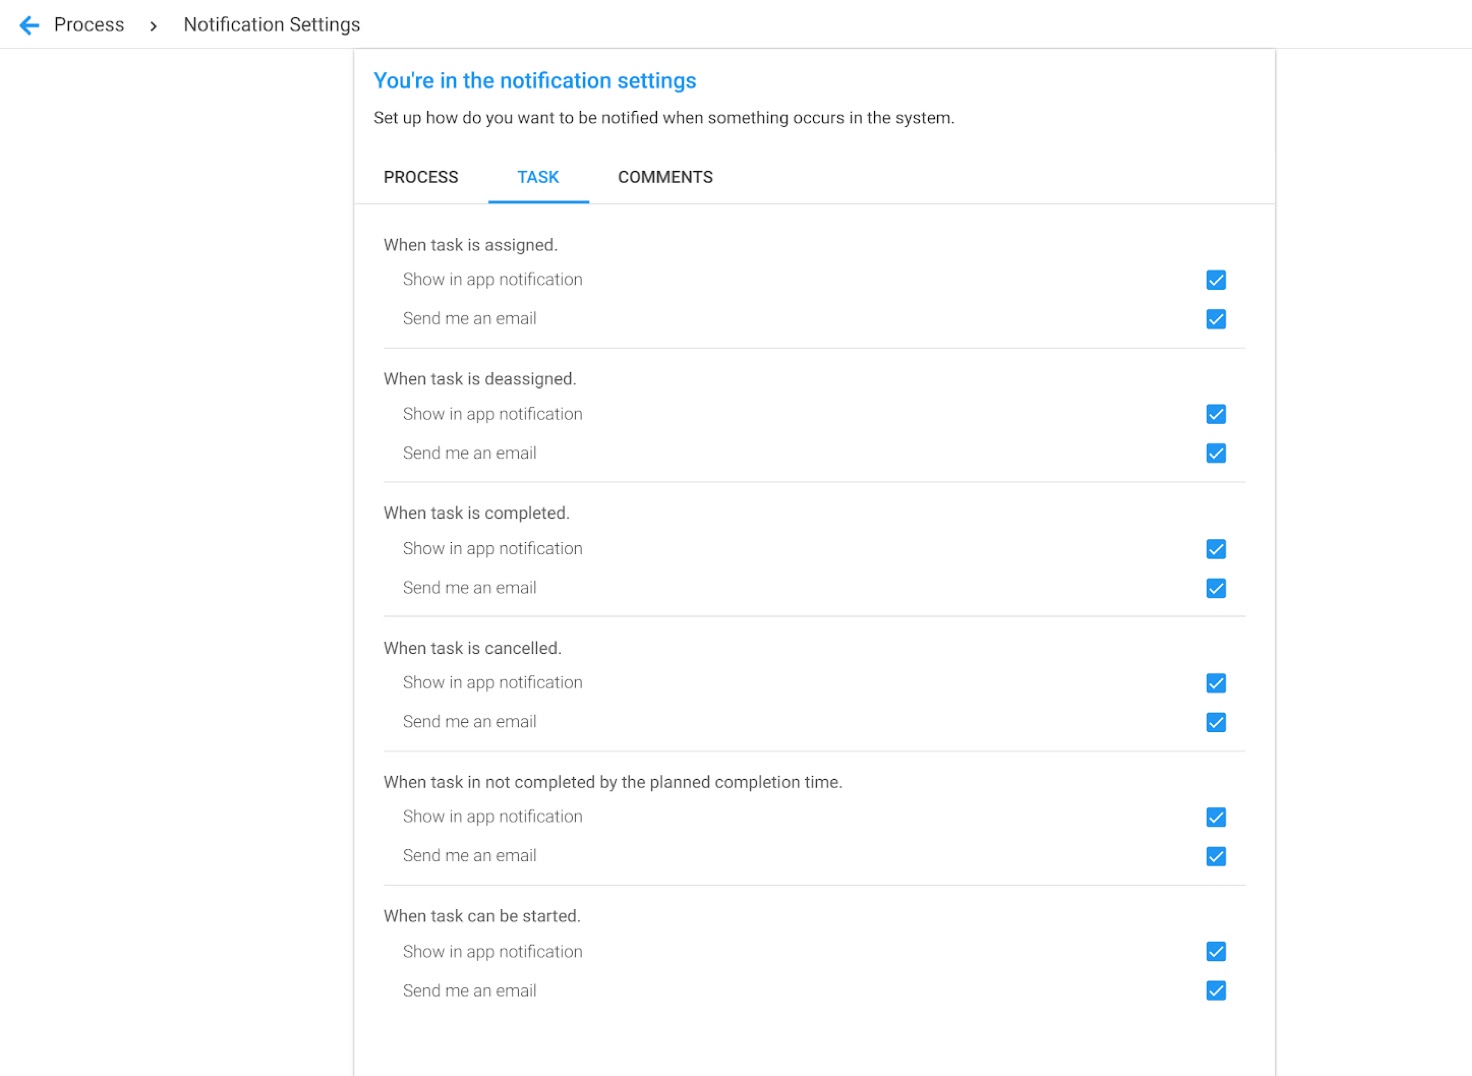
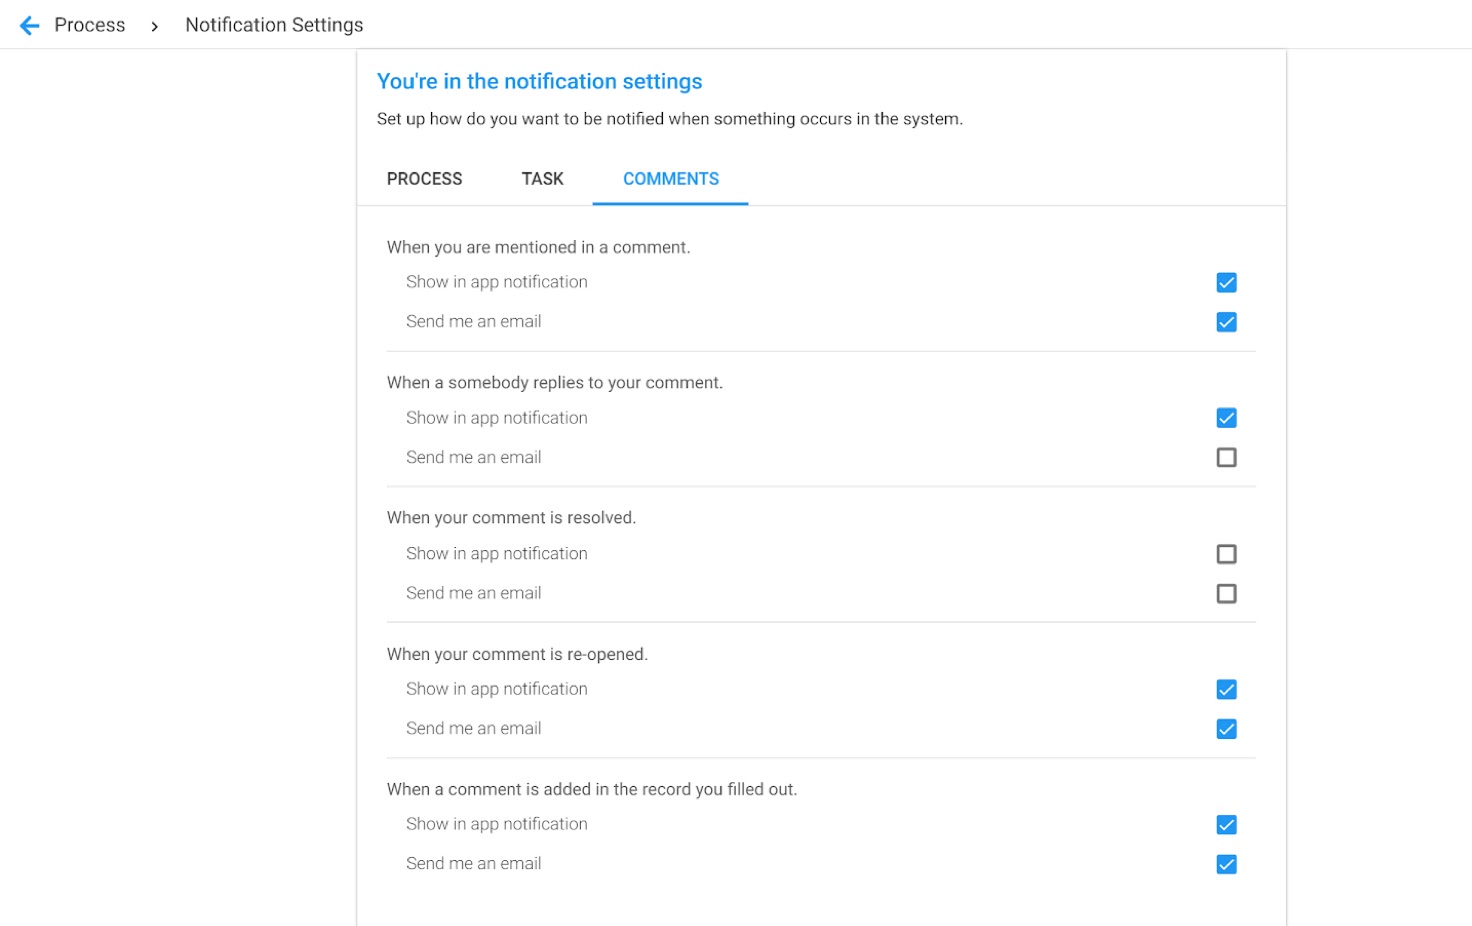
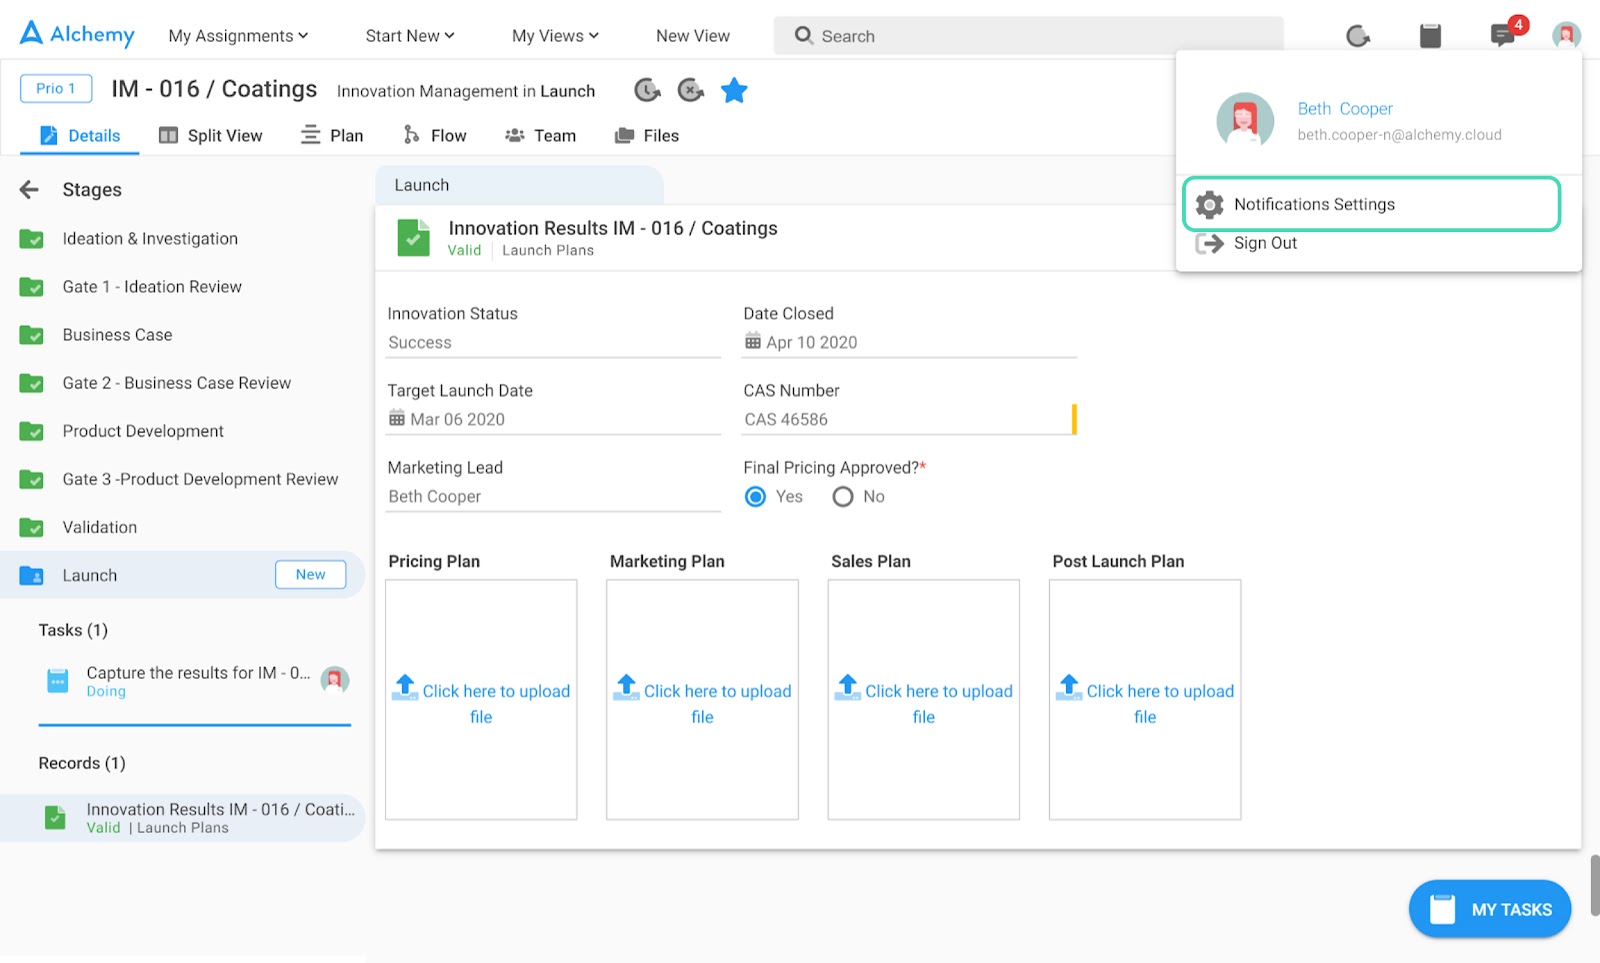
Notification Settings
You can set granular Notification Settings by clicking your User Profile icon (image or initials) in the upper right-hand corner of your screen in the main/top Alchemy application header. Once there, click the cogwheel for Notification Settings.
In Notification Settings, you can granularly select what triggers Process, Task, and Comment Notifications per the screenshots below.