New Features
1. Back Propagation Update
2. User Initiated Actions in Records
3. File Upload Improvements
4. Field indicator when calculations are not applied
1. Back Propagation Update
Updates to Record and Process Templates can now be applied to historical records and processes as well as to new ones from that point on. Adding or deleting fields and/or stages, changing calculations, adding columns in tables, changing transition rules and all other updates that can occur can now be updated historically as well.
Key End User Benefits
Often companies are afraid to make system changes because it could “break reporting.” This feature enables you to maintain data consistency over time which will help maintain both reporting integrity and improve the accuracy of search, so Alchemy can evolve with your business and operations.
Example 1 - Adding Fields
In this first example, in the record called Carbon Black X1, 2 new fields were added: Material Code and LOT Number. In the first image below on the left, a before state is shown. The record does not have the mentioned fields yet.
After adding the two fields in the Configuration UI and applying the UPGRADE, the new Carbon Black X1 record (notice that the process and record are the same) now has the Material Code and LOT Number fields. These fields will be available on all historical Material Input records as well.
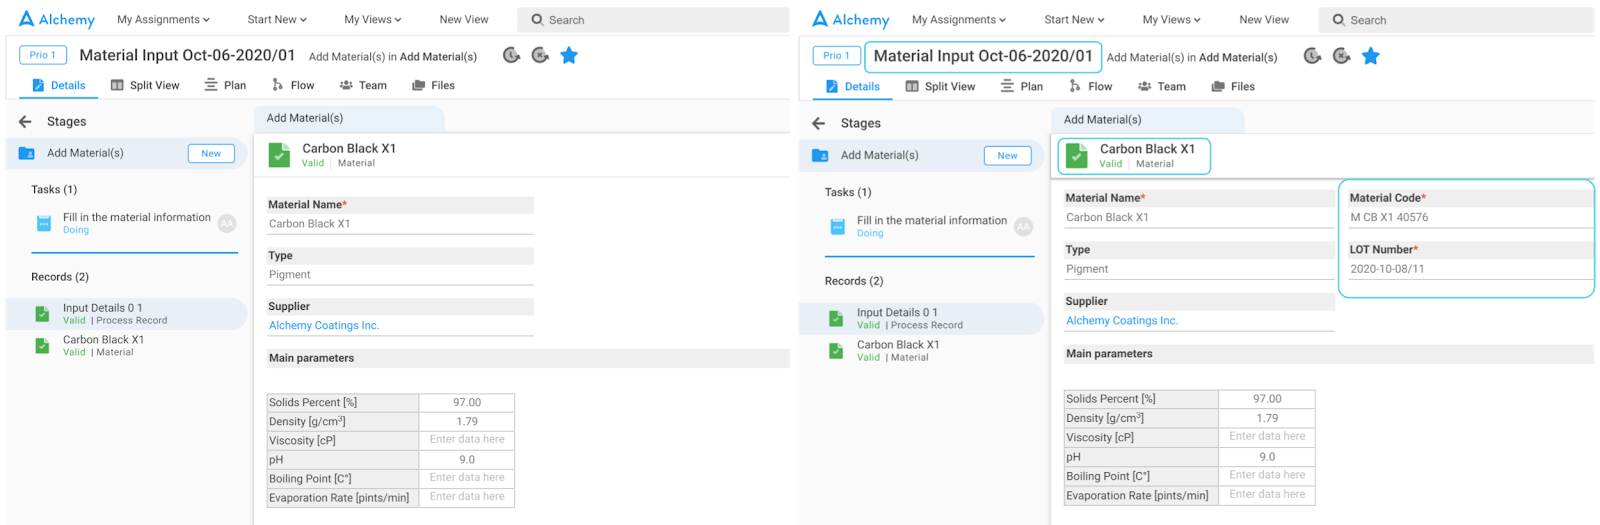
Video example:
https://vimeo.com/465861416/2f642deb8e
Example 2 - Adding an additional column in a table with calculations
In this example, we have a formulation table in a Formulating stage. As you can see in the image below on the left side, the formulation table's last column is 'Added [g]' where users enter the amount of material that was added in the formulation.
With back propagation, an additional column was added to the formulation table. The last column now, is the 'Wt %'. Fields in this column are calculated for each row for this record and for all historical formulation tables in the Formulating stage of the Lab Work process.
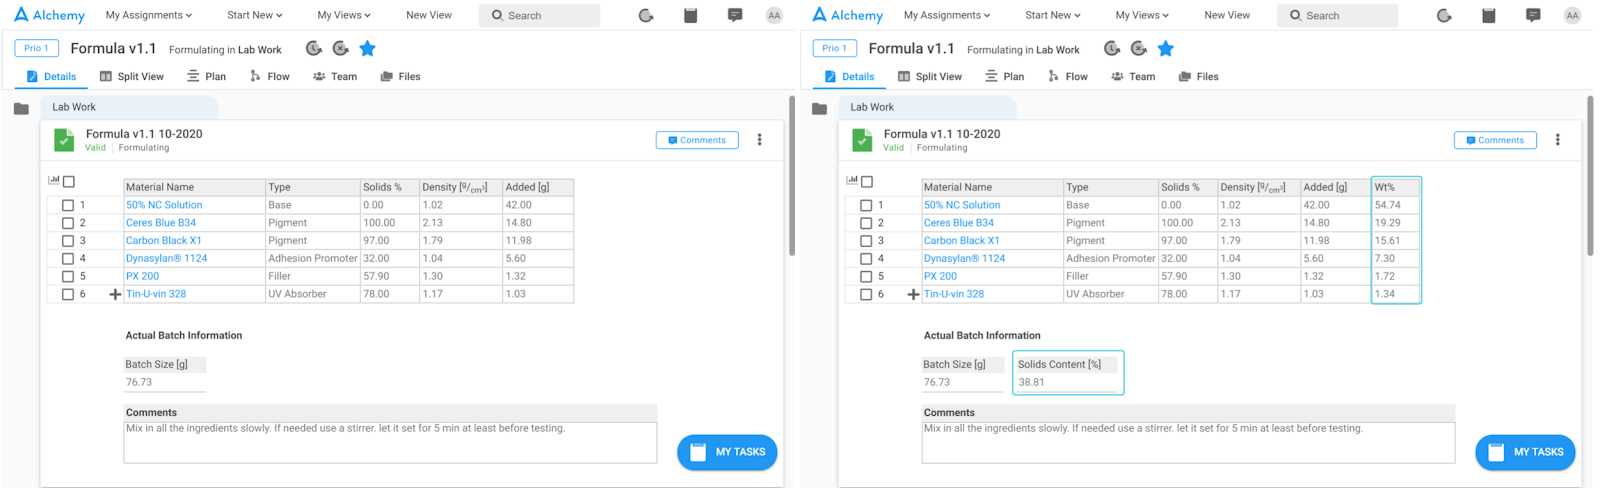
Video Example:
https://vimeo.com/465861416/2f642deb8e
Example 3 - Deleting a stage
In addition to making changes to records, changes can also be made on processes. In the example below, we are looking at a 3-stage process where the stages are: Lab Request, Formulating and Testing. It has been decided that the Formulating stage should be deleted. In the image below on the left side you can see the original flow and on the right side the changed flow with only 2 stages, Lab Request and Testing, remaining.
If the information inside the deleted stage should be kept, all records previously residing in the Formulating stage must be moved to the 1 of the 2 remaining stages. In this example, we moved the 1 record from the Formulating stage into the Testing stage as seen in the video example below.

Video Example:
https://vimeo.com/465884395/883a2621cf
2. User Initiated Actions in Records
With this release, we have introduced a new capability that will allow users to perform different actions by pressing a button inside records. There are different potential applications of these user initiated actions and we will explain a couple in these release notes.
Key End User Benefits
User Initiated Actions are like macros in spreadsheets which can be triggered by pressing a button in a record.
Triggering calculations while formulating can be useful. A couple examples include yielding a certain material to the desired batch size or normalizing the whole formulation to a new batch size. This capability needs to be configured on the Configuration UI. Please contact your Customer Success Manager to discuss what type of actions we could implement. Remember that there are multiple possibilities to configure user initiated actions, the ones in this example are those for which we think are most useful in general.
These are common actions chemists perform every day while formulating. In the first image you can see a formulation table with a Target batch size [lb] = 100. In the table we can see that we're still not quite at the mark.

A common use case is that batch size is yielded to the final targeted batch size by adding more water. To execute this, we simply select the row with water and click the 'Yield' button. Any of the materials in the formulation can be yielded to the target batch size by repeating this action. Below you can see the before and after pressing the 'Yield’ button.
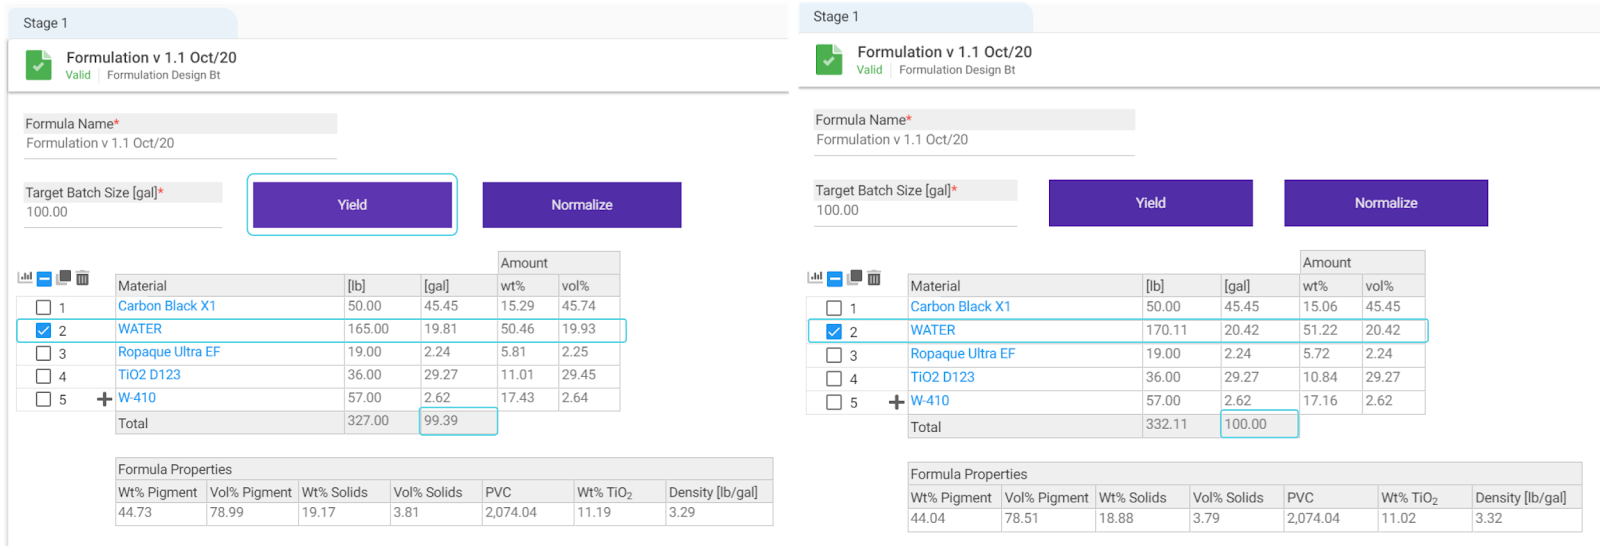
The second use case is when the whole batch needs to be scaled up. In the example below, we entered 1,000 in the Target Batch Size Field and clicked the Normalize button. You see the [gal] column automatically scaled up from 100 to 1,000 gal.

3. File Upload Improvement
The upload of multiple files is now more user friendly. Not only can multiple files be uploaded but some additional options have been introduced.
Key End User Benefits
Uploading multiple files is now much easier. The user just needs to select the files that he/she wants to attach in Alchemy. The files can be selected and then dragged and dropped into the pop up window (as you will see in the demonstrations below). This will allow much faster manipulation of files and speed up your work. Upload of multiple files needs to be configured on the Configuration UI. Please contact your Customer Success Manager if you'd like to attach multiple files.
Editing of photos can be easily performed. Now there will be no need to crop or rotate images and photos before attaching them to Alchemy, it can all be done while uploading files.
Attaching files
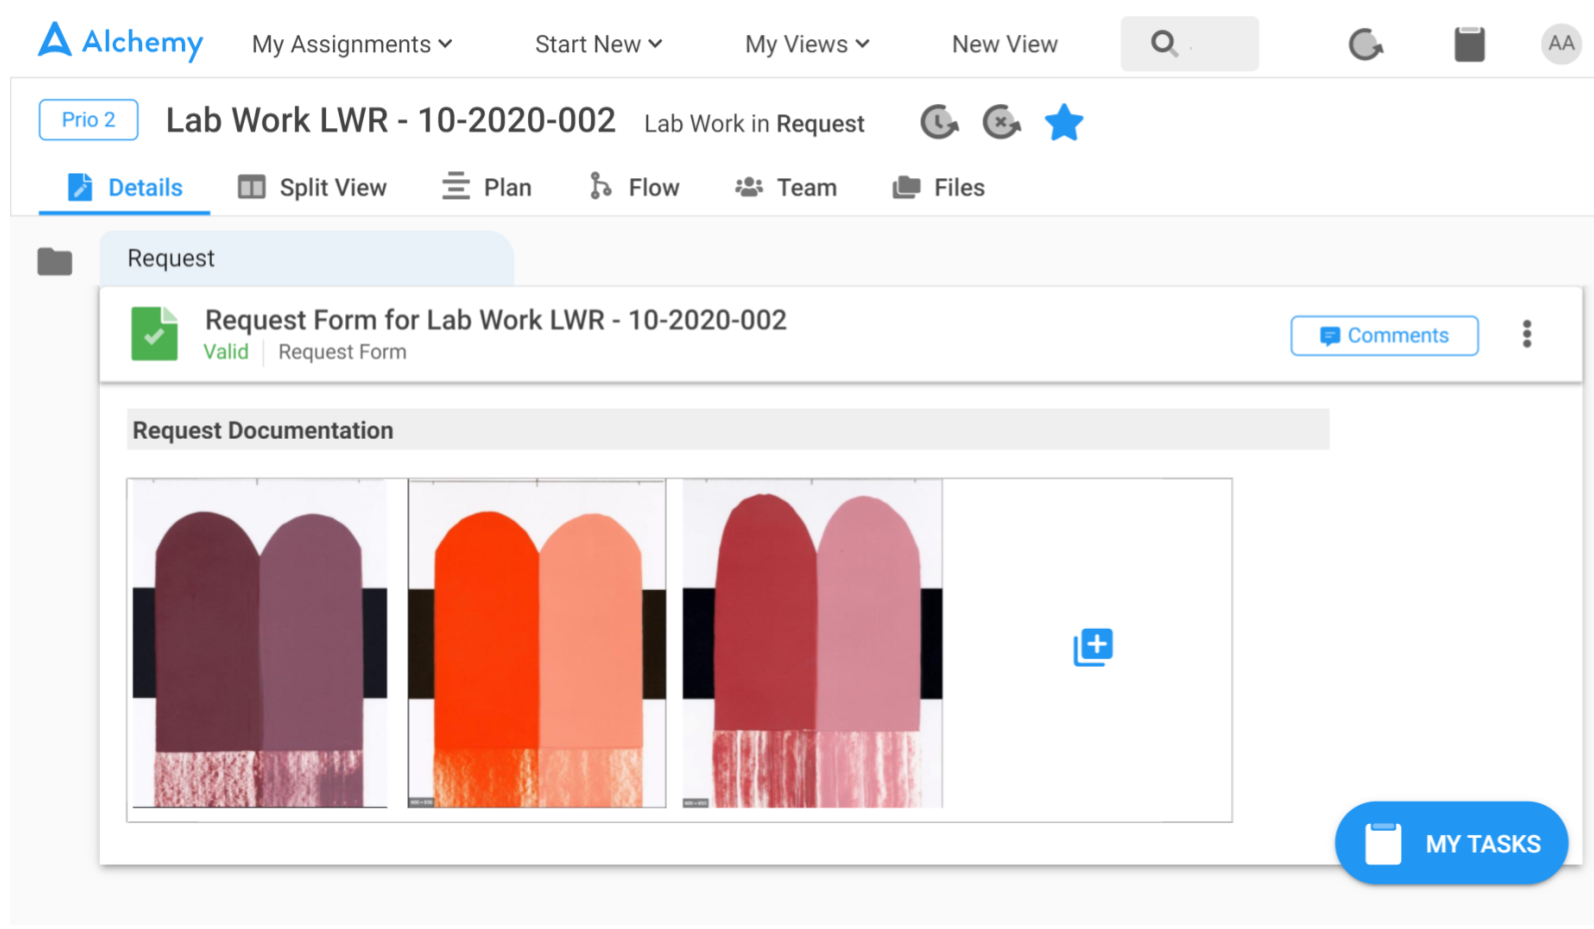
In the Lab Work process, the first record is a Request Form. A part of the form is dedicated to attaching Request documents. As shown in the image below, there is a square with a '+' icon inside. By pressing that button a pop up window will appear.

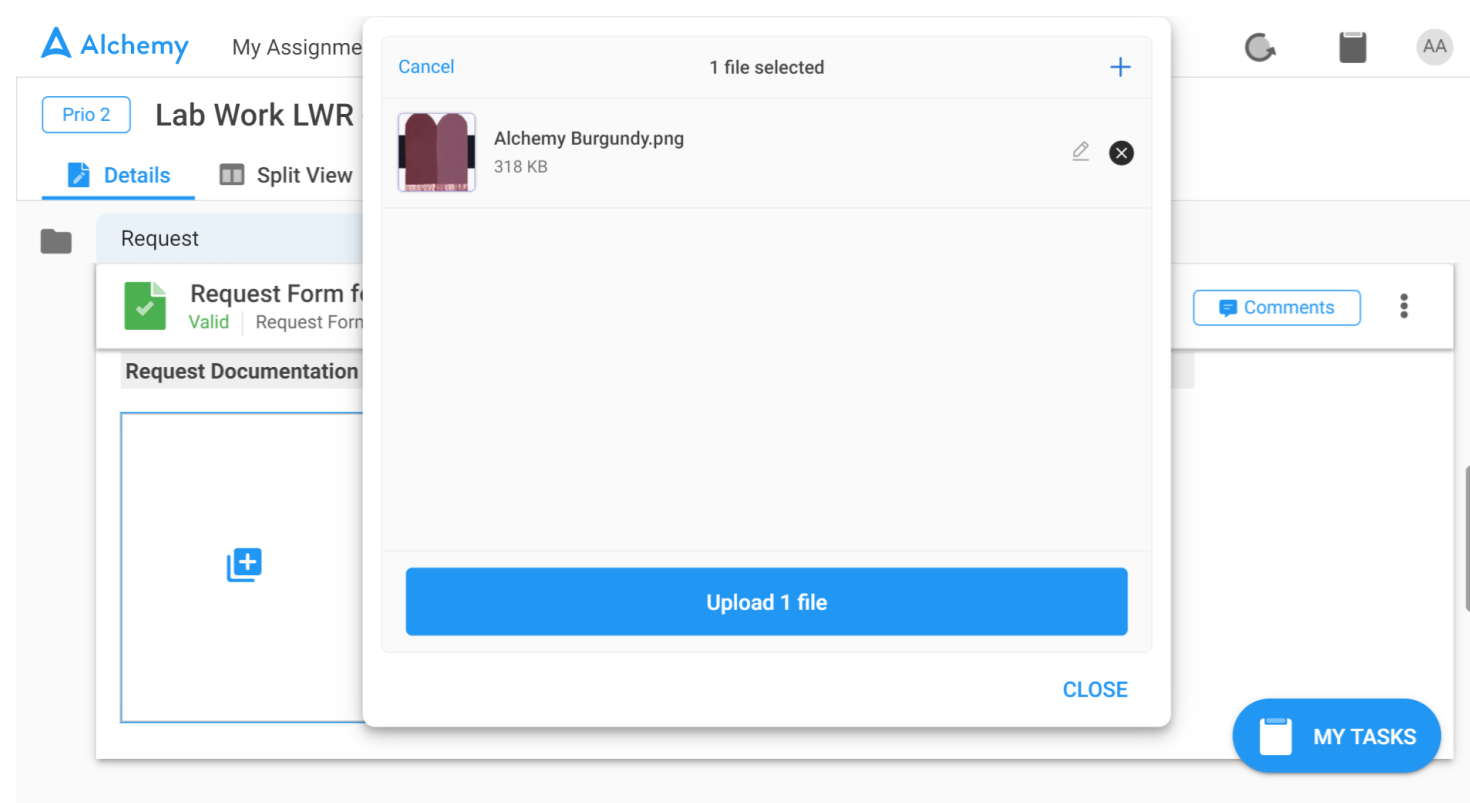
Files can be pasted in this pop up window, dragged and dropped or imported from a folder.
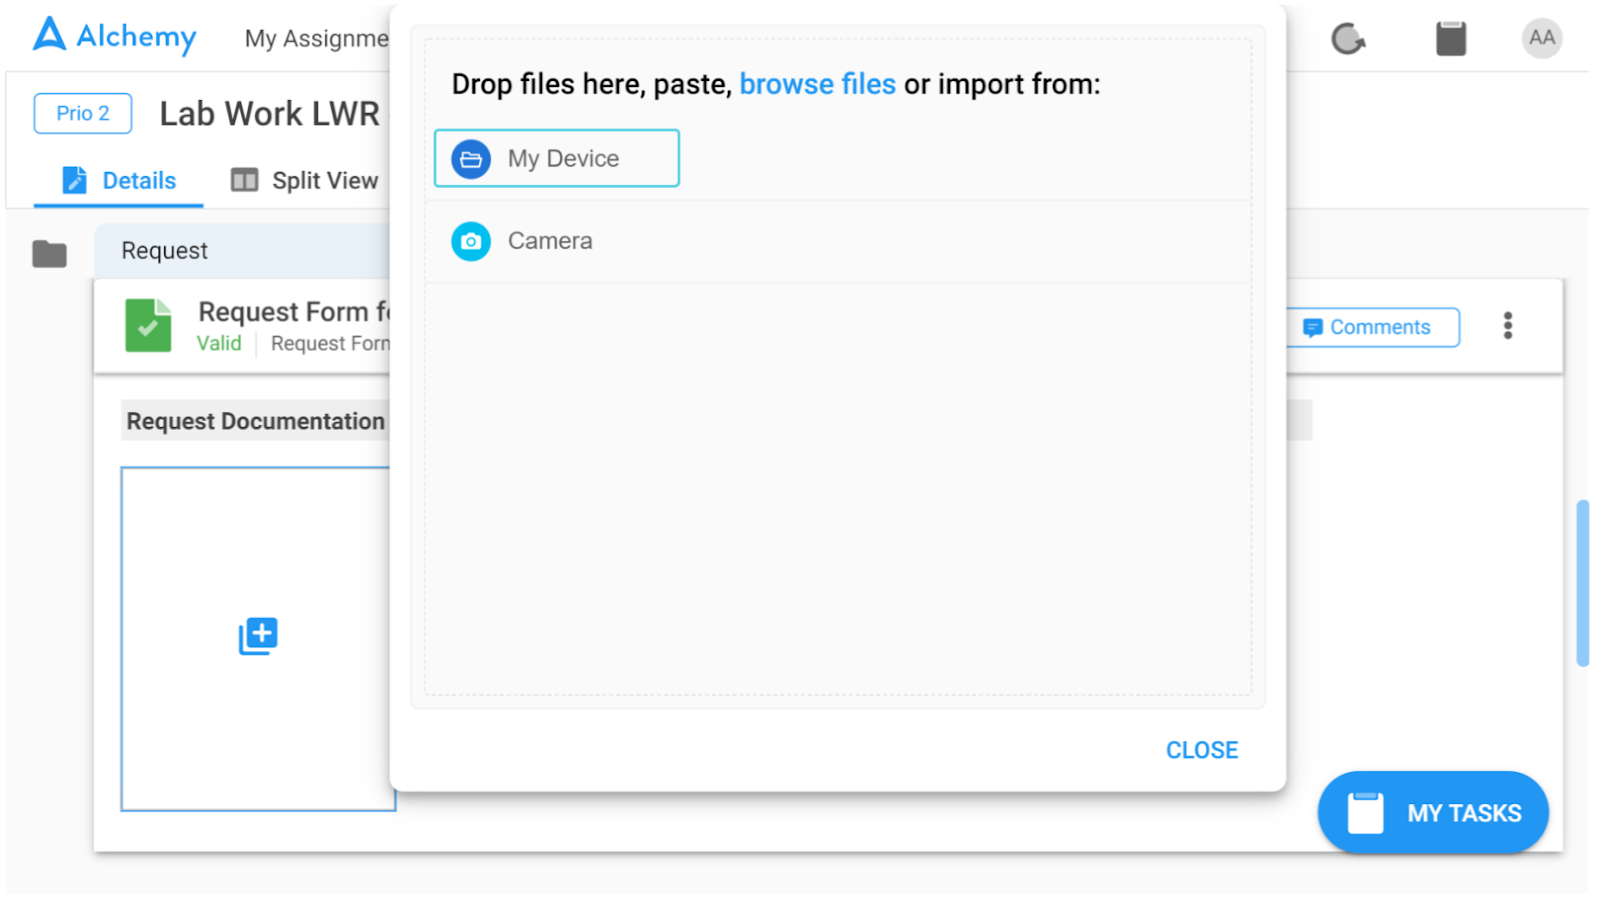
If you select 'My Device' a dialogue will appear where you can choose from which folder to select files. You can select multiple files by holding the Ctrl key and selecting by clicking on files. The second option 'Camera' is possible if your device has a camera. In that case you have the possibility to take a photo on the spot or record a video.

When you select the files and click 'Open' the pop up window will look as in the image below. Click the blue 'Upload 3 files' button.

When the files are uploaded they are stacked next to each other:
Dragging and dropping files is demonstrated below:

Check out this video.
Edit files
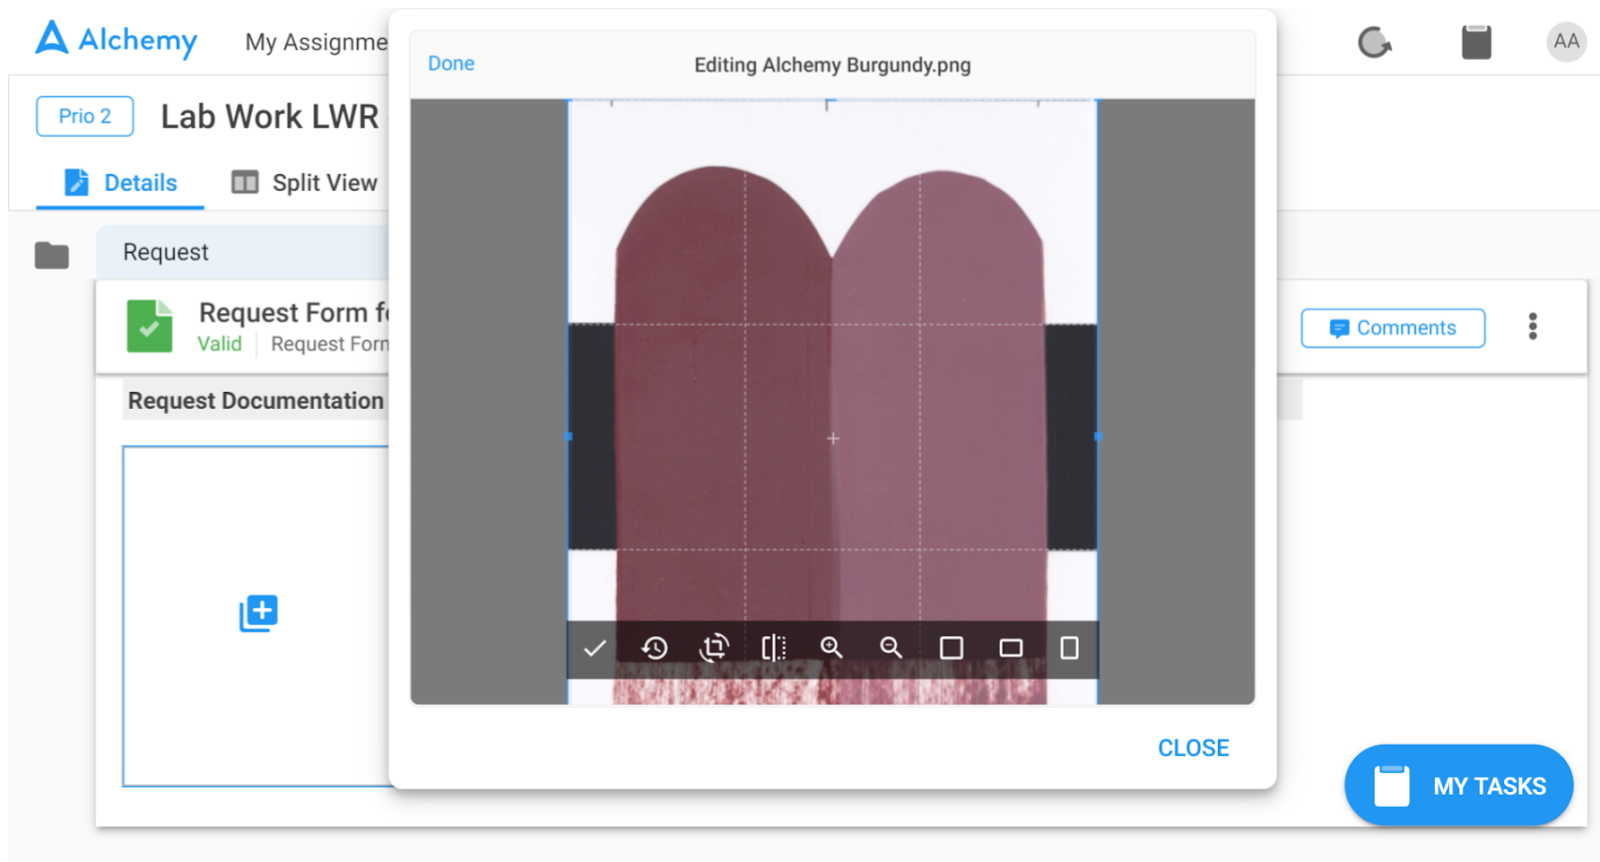
When you're attaching files, before clicking the blue button for upload if you hover over a file there is a small edit icon.
In this next dialogue you have the possibility to change the file name or to click on the 'Edit' button to get more options.

When clicking on the Edit button the dialogue below will appear. You have the options to rotate, flip the image, crop, zoom in or out.
4. Field indicator when calculations are not applied
In some cases the field that is calculated can be manually overwritten by users. Now, we've introduced an indicator to notify the user that the field has been overwritten. Furthermore, there is an option to re-apply the calculation.
Key End User Benefits
If multiple users are entering information in the same table and/or reviewing afterwards it is useful to know for which fields calculations were overwritten. By understanding which fields were changed the calculations can be reapplied.
See an example below. The marked field is the SUM of the column 'Added [g]' in the Formulation table. The yellow mark indicates that the calculation has been overridden.
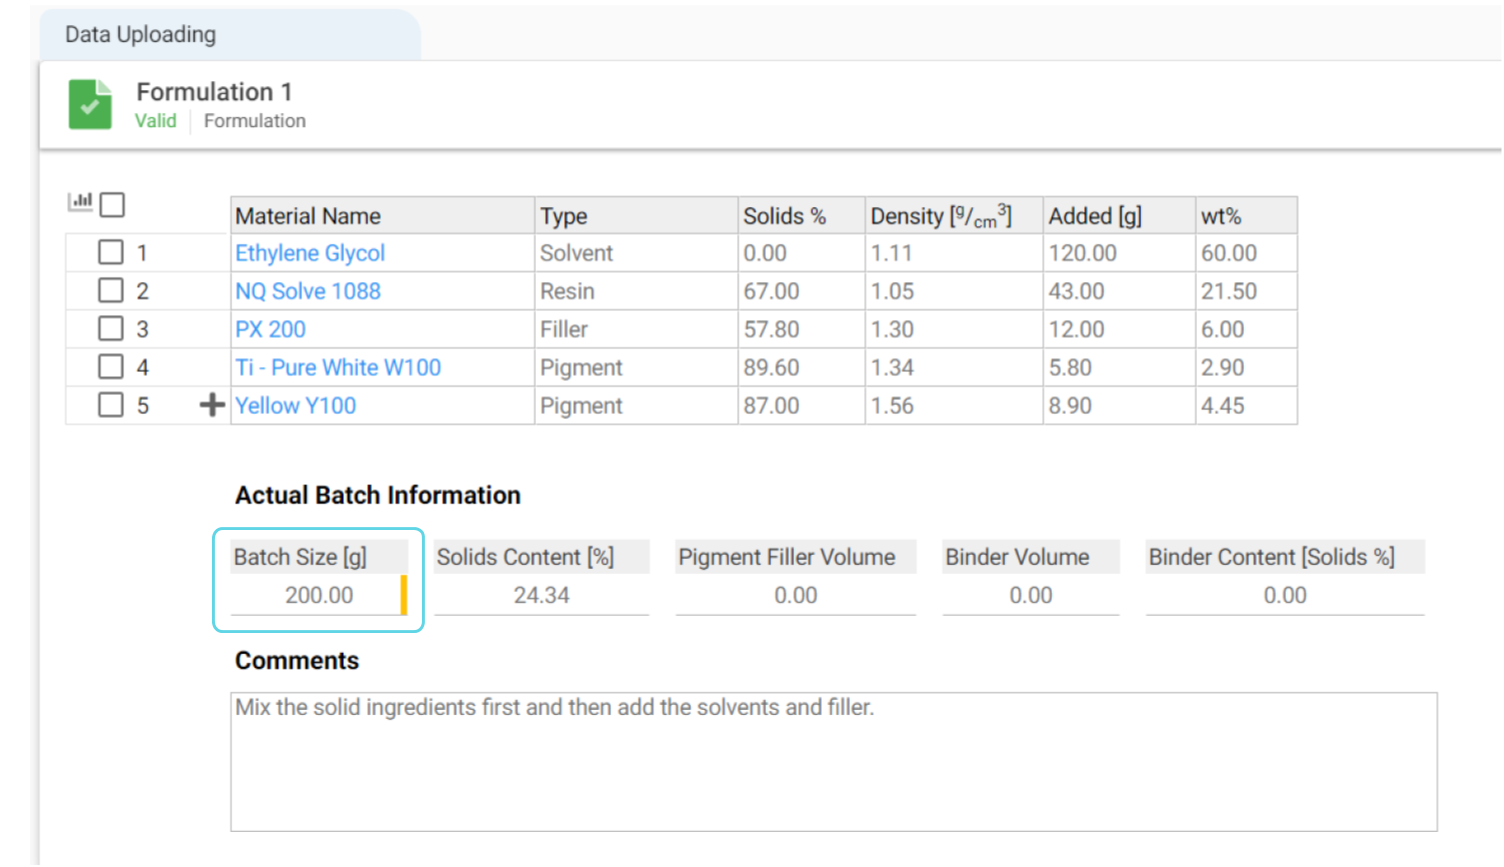
When hovering over the field a small box with additional info is available. When clicking on the 'Apply Formula' button the field will be calculated again according to the original set up.
