Introduction

Figure 1. Sample Label - User Portal
The integration of print label functionalities into ELN and LIMS systems offers several advantages, enhancing the overall efficiency and accuracy of laboratory workflows. The benefits of print label functionalities include:
- Sample Identification and Tracking: Accurate and automated labeling facilitates easy tracking of samples throughout their lifecycle.
- Data Integrity and Reduce Errors: Automated labeling eliminates the need for redundant data entry and reduces the risk of manual errors associated with handwritten labels.
- Compliance with Standards: Print label functionalities help laboratories meet these compliance requirements by providing a standardized and traceable labeling system.
- Streamlined Workflow: Printing labels directly from the ELN or LIMS system streamlines the sample preparation process. It reduces the time and effort required for manual data entry and labeling, allowing laboratory staff to focus on other critical tasks.
- Efficient Sample Management: Labels can include essential information about the sample, such as: sample code, expiration date, and other relevant details.
- Customization and Flexibility: Print label functionalities typically offer customization options for label design and layout. Laboratories can tailor labels to their specific needs, incorporating relevant information and branding elements.
- Facilitation of Batch Processing: Supports batch printing of labels for multiple samples simultaneously. Particularly useful in high-throughput environments where efficiency and speed are crucial.
- Enhanced Communication: Clear and standardized labels improve communication within the laboratory team. It reduces the likelihood of misinterpretation or confusion regarding sample details.
Sample Label Overview
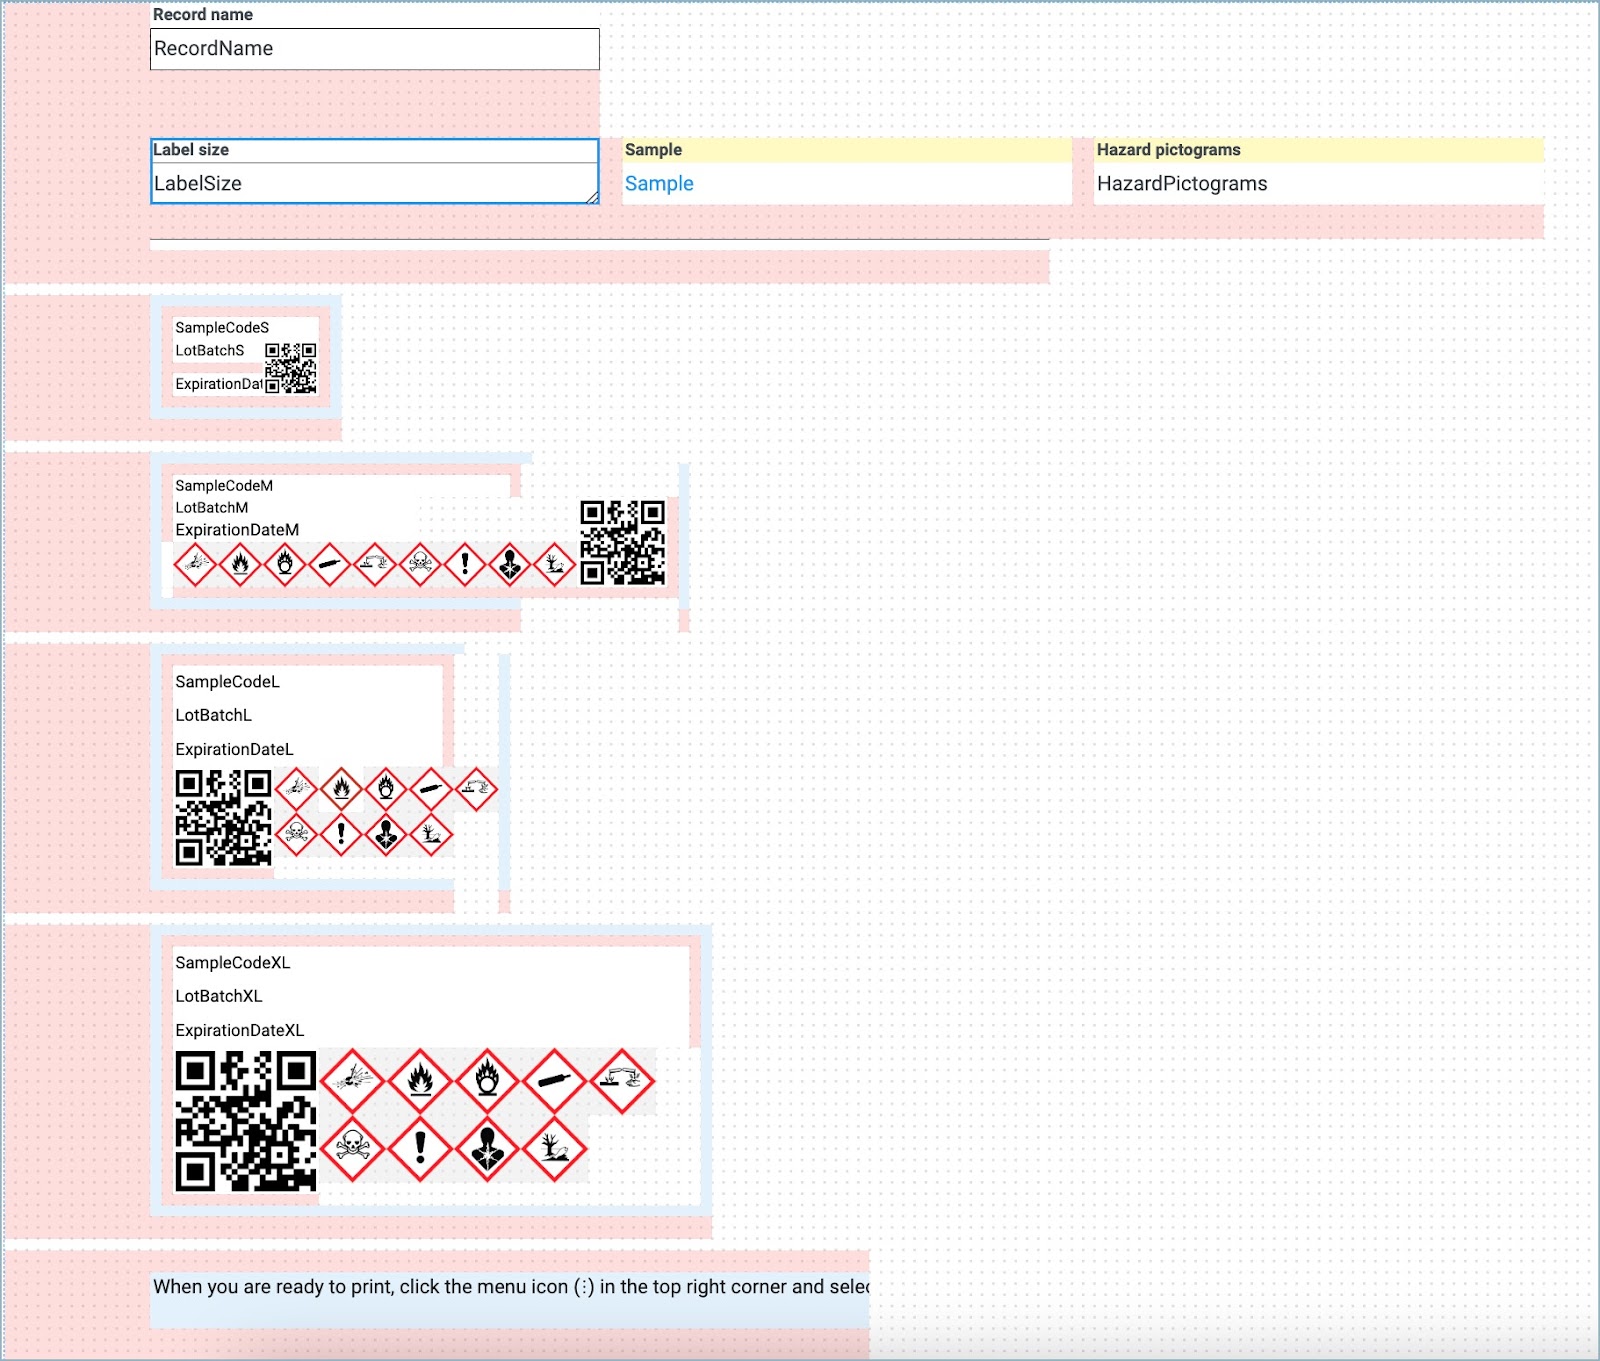
Figure 2. Sample Label Record Template - Configuration Portal
On every individual sample record, there is a Print Label button available. This feature automates the creation of a Sample Label record, generating one if it does not exist or opening the existing label if it has already been created.
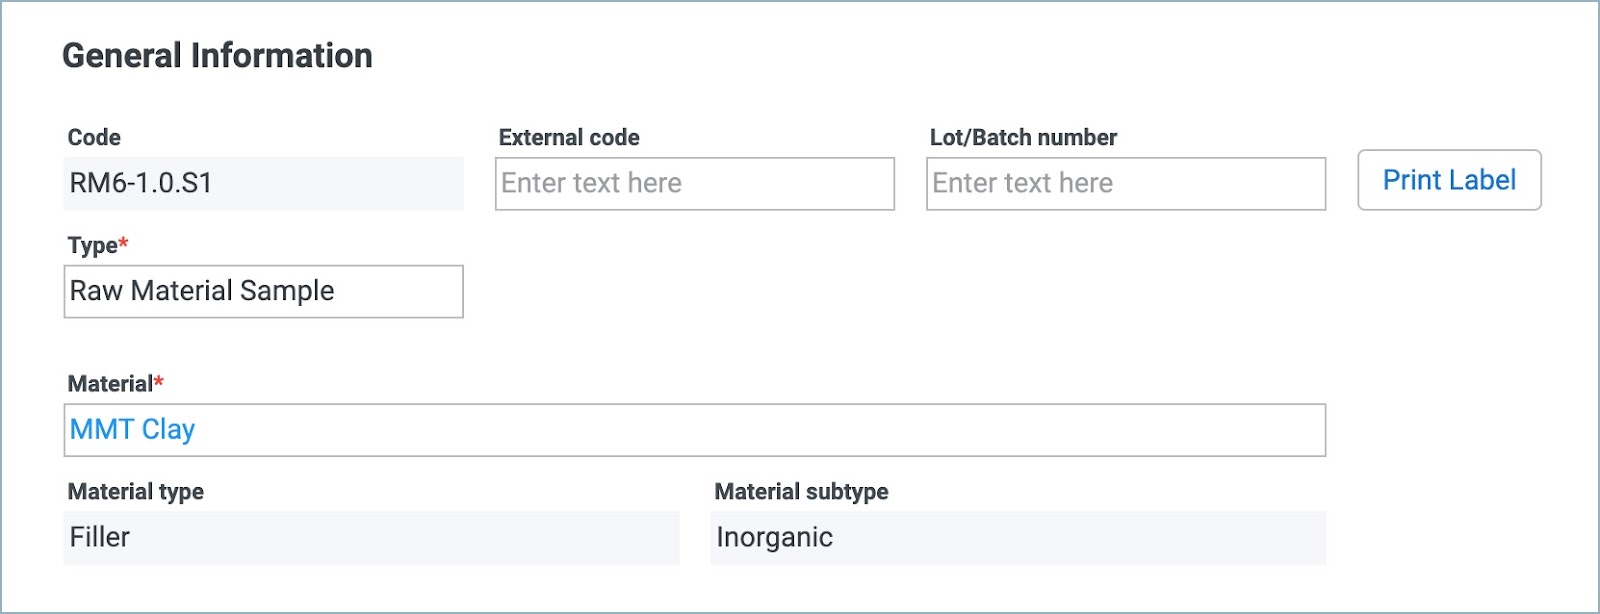
Figure 3. Sample Record - Print Label
As part of our research, we have identified four standardized and most commonly used proportions for the sample labels, allowing users to conveniently select the size that suits their needs.
Standardized proportions of the label are:
- 1.25" x 0.75" (3.18 cm x 1.91 cm) - S
- 1" x 2.625" (2.54 cm x 6.67 cm) - M
- 2.125" x 1.6875" (5.40 cm x 4.29 cm) - L
- 4" x 2" (10.16 cm x 5.08 cm) - XL
Tip: If the predefined label proportions do not align with your specific requirements, you have the option to create a custom label proportion. However, be mindful that when configuring custom proportions, it is essential to allocate ample space and margin around the content, ensuring there is at least a one-box margin. This practice guarantees a professional and visually balanced presentation (see image below).
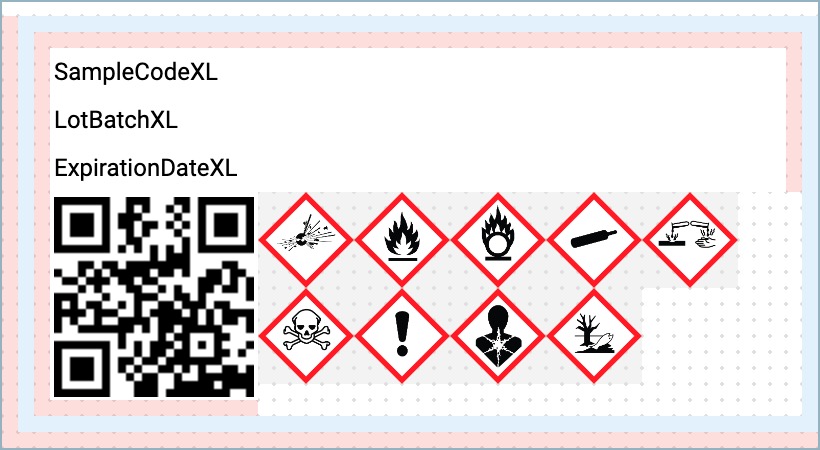
Figure 4. Margin Space inside the Label
Steps to Create a Custom Label Record
Use Case 1: My current labels show Sample Code, Lot/Batch Number and Expiration Date as relevant information. I want to alter the Label record to have a Sample Code, Material Name, Location and Expiration Date.
Steps to be followed:
- Open the Configuration Portal
- Go to the Record Templates homepage and search for the Sample Label record template
- Change the formula expression for Lot/Batch Number:
- Find the field with the expression Sample.BatchNumber
- Update the expression to: 'Material: ' + Sample.Material.Name
- Tip: This calculation combines the label 'Material:' with the expression 'Sample.Material.' Please be mindful of the label length to prevent information from being truncated or broken.
- In certain label sizes, notably S and M labels, there may not be sufficient space to include all required information. To address this, consider omitting non-essential elements, such as hazard pictogram images. If you are using L or XL label sizes, you have the option to either resize hazard images and QR code fields, or omit them entirely. In the JSON file, you can either copy the inputs prepared for you or create new ones with the same style as other fields in the label.
- Tip: To check what label appears based on what option is selected above, see the visibility condition of the fields.
- Add the formula expression to the new field: ‘Location: ’ + Sample.Location.Name
- Publish - Validate changes
- Back Propagate + Push to production
Use Case 2: I want to alter the Label record to have only one label size because there is no need for another label size.
Steps to be followed:
- Open the Configuration Portal
- Go to the Record Templates homepage and search for the Sample Label record template
- In the Label Size input field, set the default size of the label in the field Formula Expression and check hidden as a property for this input
- Update the Divider label:
- Delete the bottom border
- Update the margin bottom from 3 to 5
- Publish - Validate changes
- Back propagate + Push to production
Use Case 3: I want to alter the Label record to have only one label size. There is no need for another label size but a new label size is not in the given options.
Steps to be followed:
- Open the Configuration Portal
- Go to the Record Templates homepage and search for the Sample Label record template
- Choose the closest label size to alter elements inside the label
- In the Label Size input field, set the default size of the label in the field Formula Expression and check hidden as a property for this input
- Update the Divider label:
- Delete the bottom border
- Update the margin bottom from 3 to 5
- Update the label dimension according to the needed proportions:
- Change the border label according to the needed proportions
- The margin inside the label should be 1 box minimum
- Be aware that one box in CP is 8x8px
- Organize and arrange input fields according to the new proportion.
- Publish - Validate changes
- Back propagate / Push to production
Use Case 4: When I scan a QR code I want it to redirect me to the Sample record in Alchemy.
Steps to be followed:
- Open the Configuration Portal
- Go to the Record Templates homepage and search for the Sample Label record template
- Add an alphanumeric field with an identifier, ThisTenant, and a formula expression, Tenant. Make this field not reportable, not printable, and hidden.
- Click the QR code image and update the Formula Expression field to the following expression:
- "https://app.alchemy.cloud/" + ThisTenant + "/record/" + Sample.Id
- Publish - Validate changes
- Back propagate + Push to production
Label Content
The table below outlines the list of all necessary input and helper fields, as well as labels needed to create a Sample Label record.
.jpeg)
Each label includes a specific set of information, contingent on the chosen label size and the available space for presenting details in that particular proportion. It is imperative to note that the printed labels must uphold readability and ease of scanning for laboratory users.
In addition to non-editable input fields that display pertinent information from the current sample, a mandatory element is the QR code field. This field enables users to effortlessly scan the code, facilitating seamless continuation of work in the laboratory.
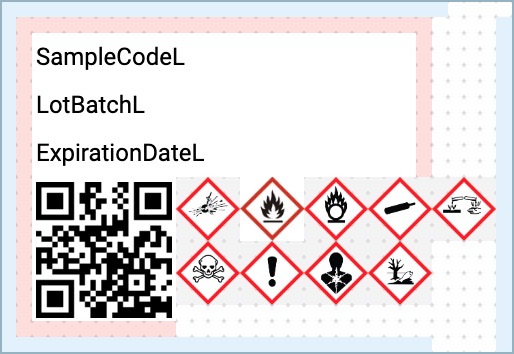
Figure 5. Input Fields inside the Label
An input field is systematically labeled with a base name (SampleInfo) and suffix corresponding to its designated label size (S1, M1, L1, XL1). For example, "SampleInfoS1" signifies the first information field is the smallest label with a 1.25" x 0.75" (3.18 cm x 1.91 cm) proportion.
When dealing with multiple label sizes, it is crucial to maintain consistency by inputting the same information in fields with matching base names.
In instances where displaying hazard pictograms is not relevant, additional identifiers, indicated by ‘A’, are appended to the end of the input fields (S1A, M1A, L1A, XL1A). This ensures unique identification, as seen in examples like "SampleInfoS1A" and "SampleInfoM1A."
The table below outlines the quantity of information presented in each label proportion, both with and without hazard pictograms.
.jpeg)
Tip: If there is a need to streamline the information presented on the label, you can choose to either hide or remove certain input fields. Following the design guidelines specified in the Field Property Guidelines, you can then restructure the label content. This aligns with established design principles, maintaining coherence in the overall presentation.
Design Guidelines
The following table presents a general guideline for input fields within the label.
.jpeg)
Sample Label Examples

Figure 6. Sample Labels
Conclusion
In summary, the ability to label and print labels for samples in ELN and LIMS systems enhances sample management, improves data integrity, and contributes to the overall efficiency and reliability of laboratory operations.
This document provides you the tools to create personalized Sample Label records that align with user requirements. If you find the need for a custom label, reach out to your designated Customer Success manager, who will assist you in designing the label to best suit your organization's needs.