Purpose
This guide outlines how to apply advanced search filters to data in a View.
Instructions
1. Click the Filters tab in the View to open the Advanced Search window.
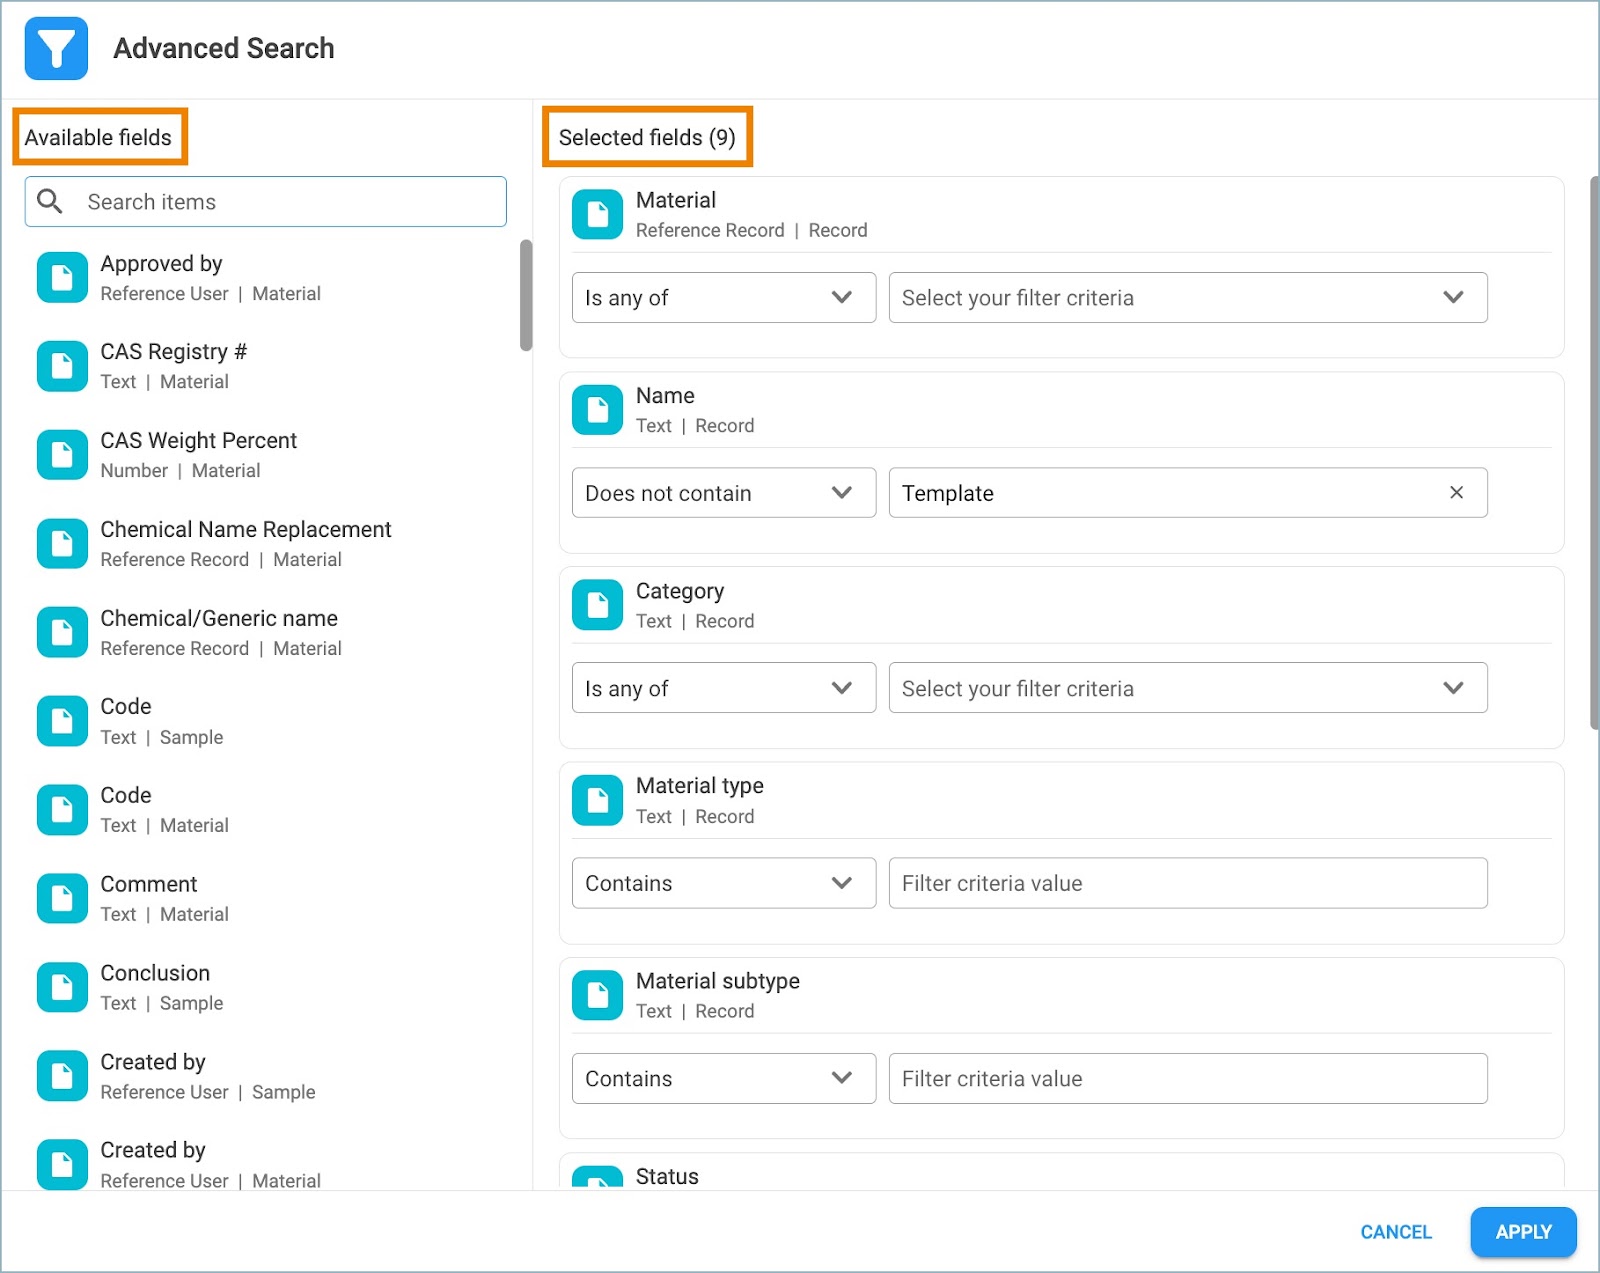
2. The Advanced Search window consists of two parts:
- Available Fields - Fields related to the data chosen in the View
- Selected Fields - Columns already added to the View
3. Click or drag the desired field in the Available Fields section to move it to the Selected Fields section. A column containing data from the Selected Field will appear in the View.
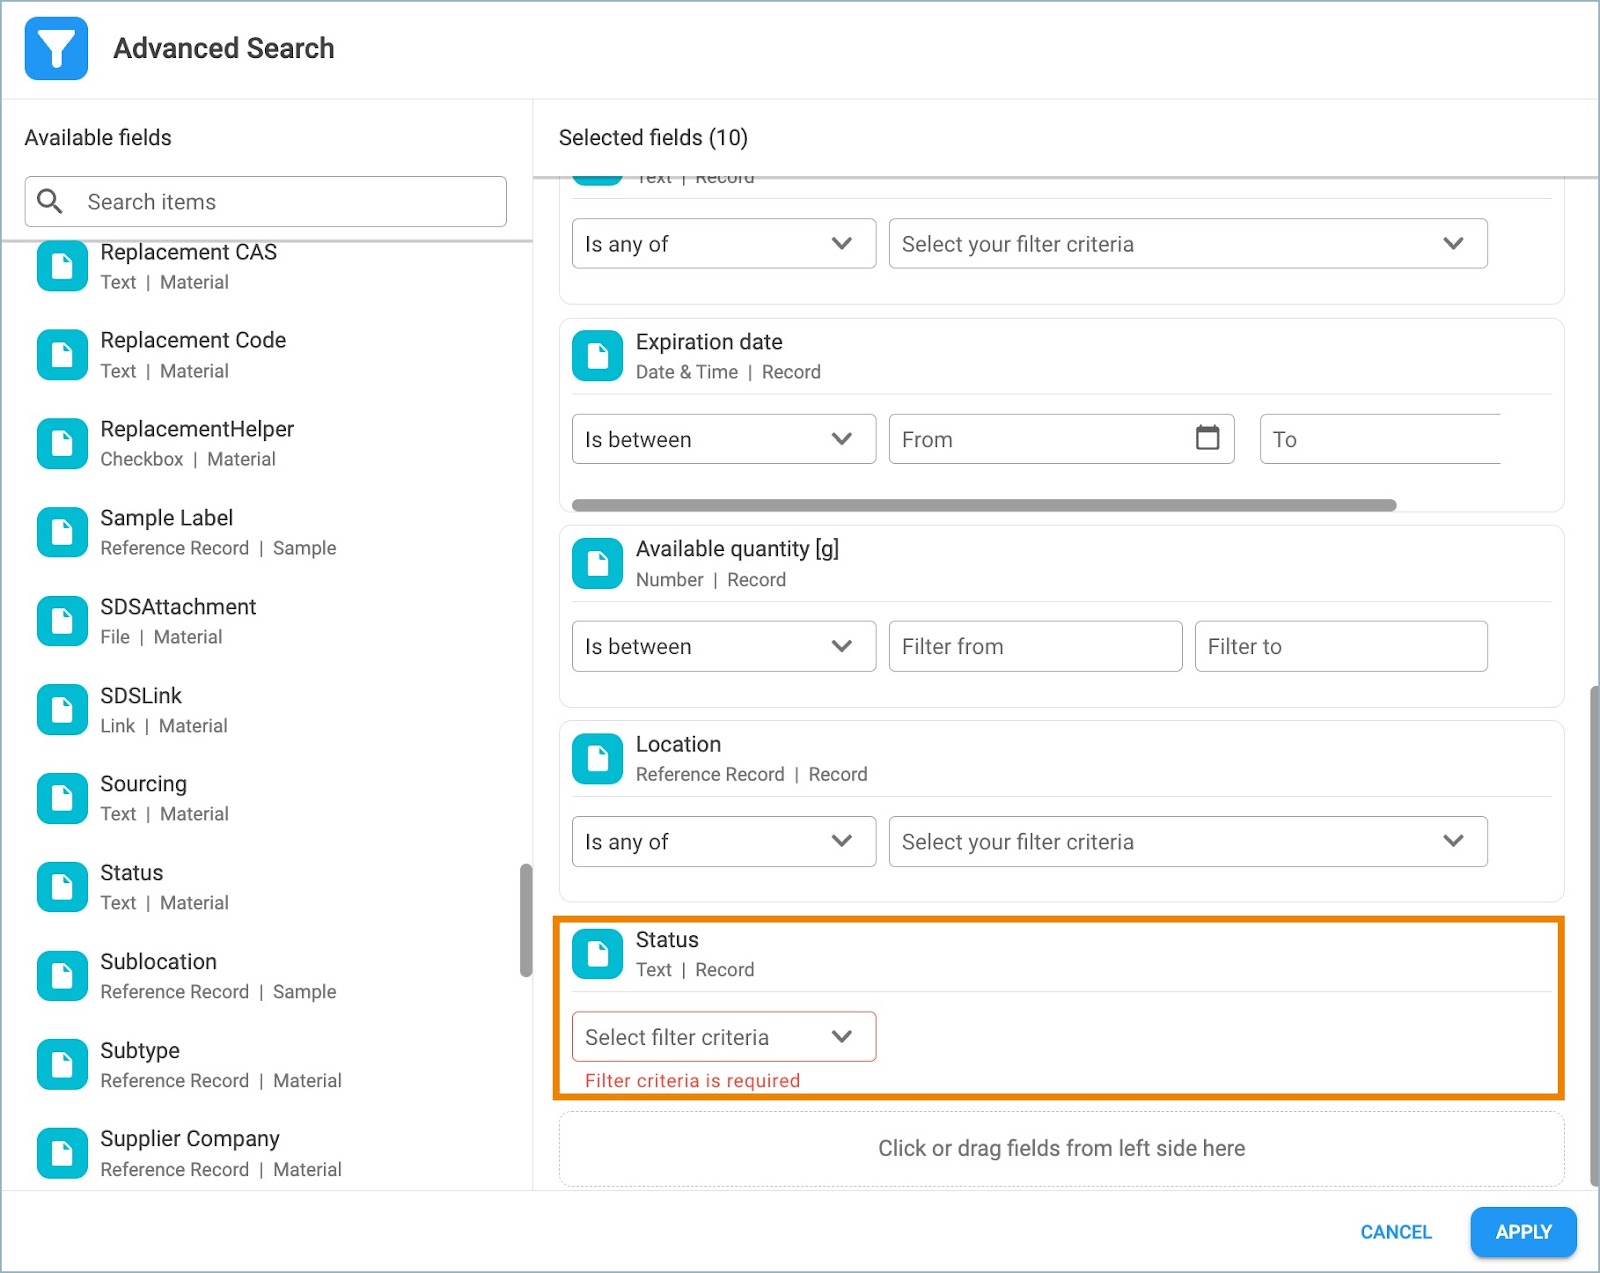
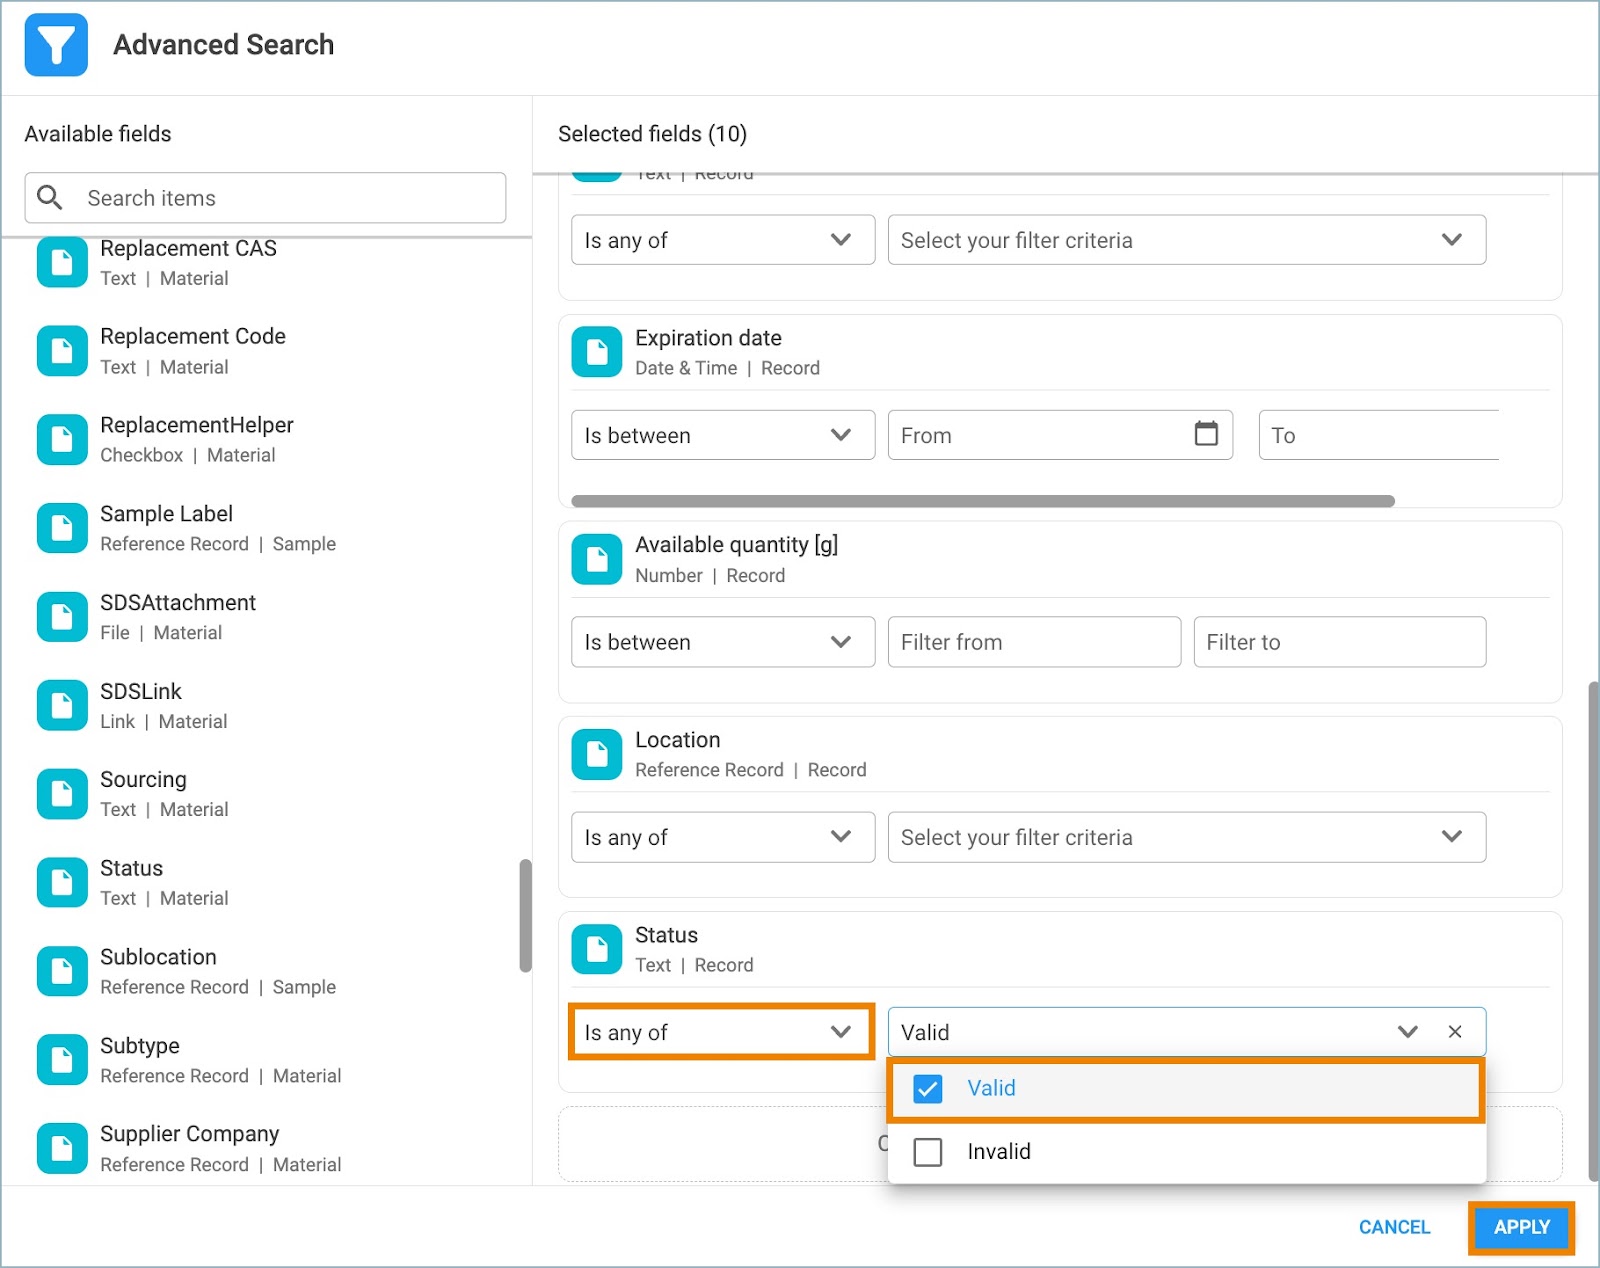
4. Set up the filter criteria from the dropdown. Depending on the data type (text, date & time, number, etc.), different filter criteria are available. After selecting the desired filter criteria, set the values or ranges according to which filtering will be performed. Click Apply.
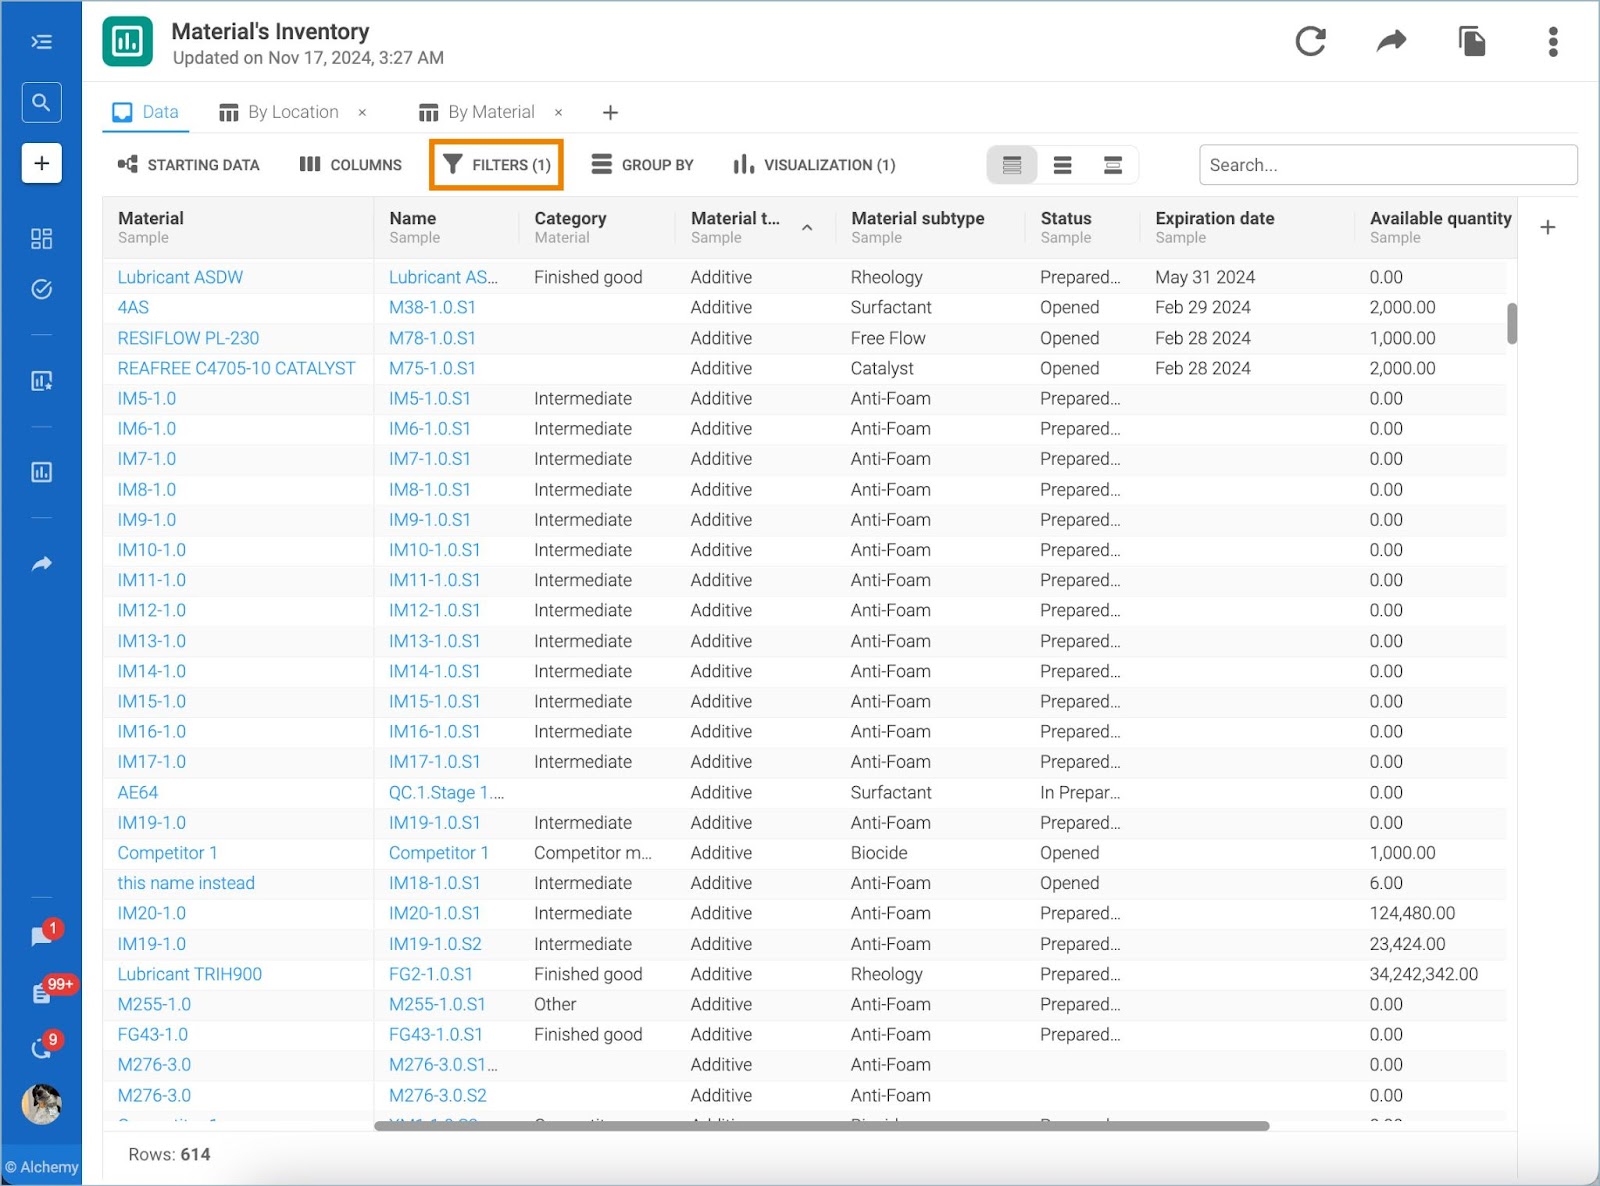
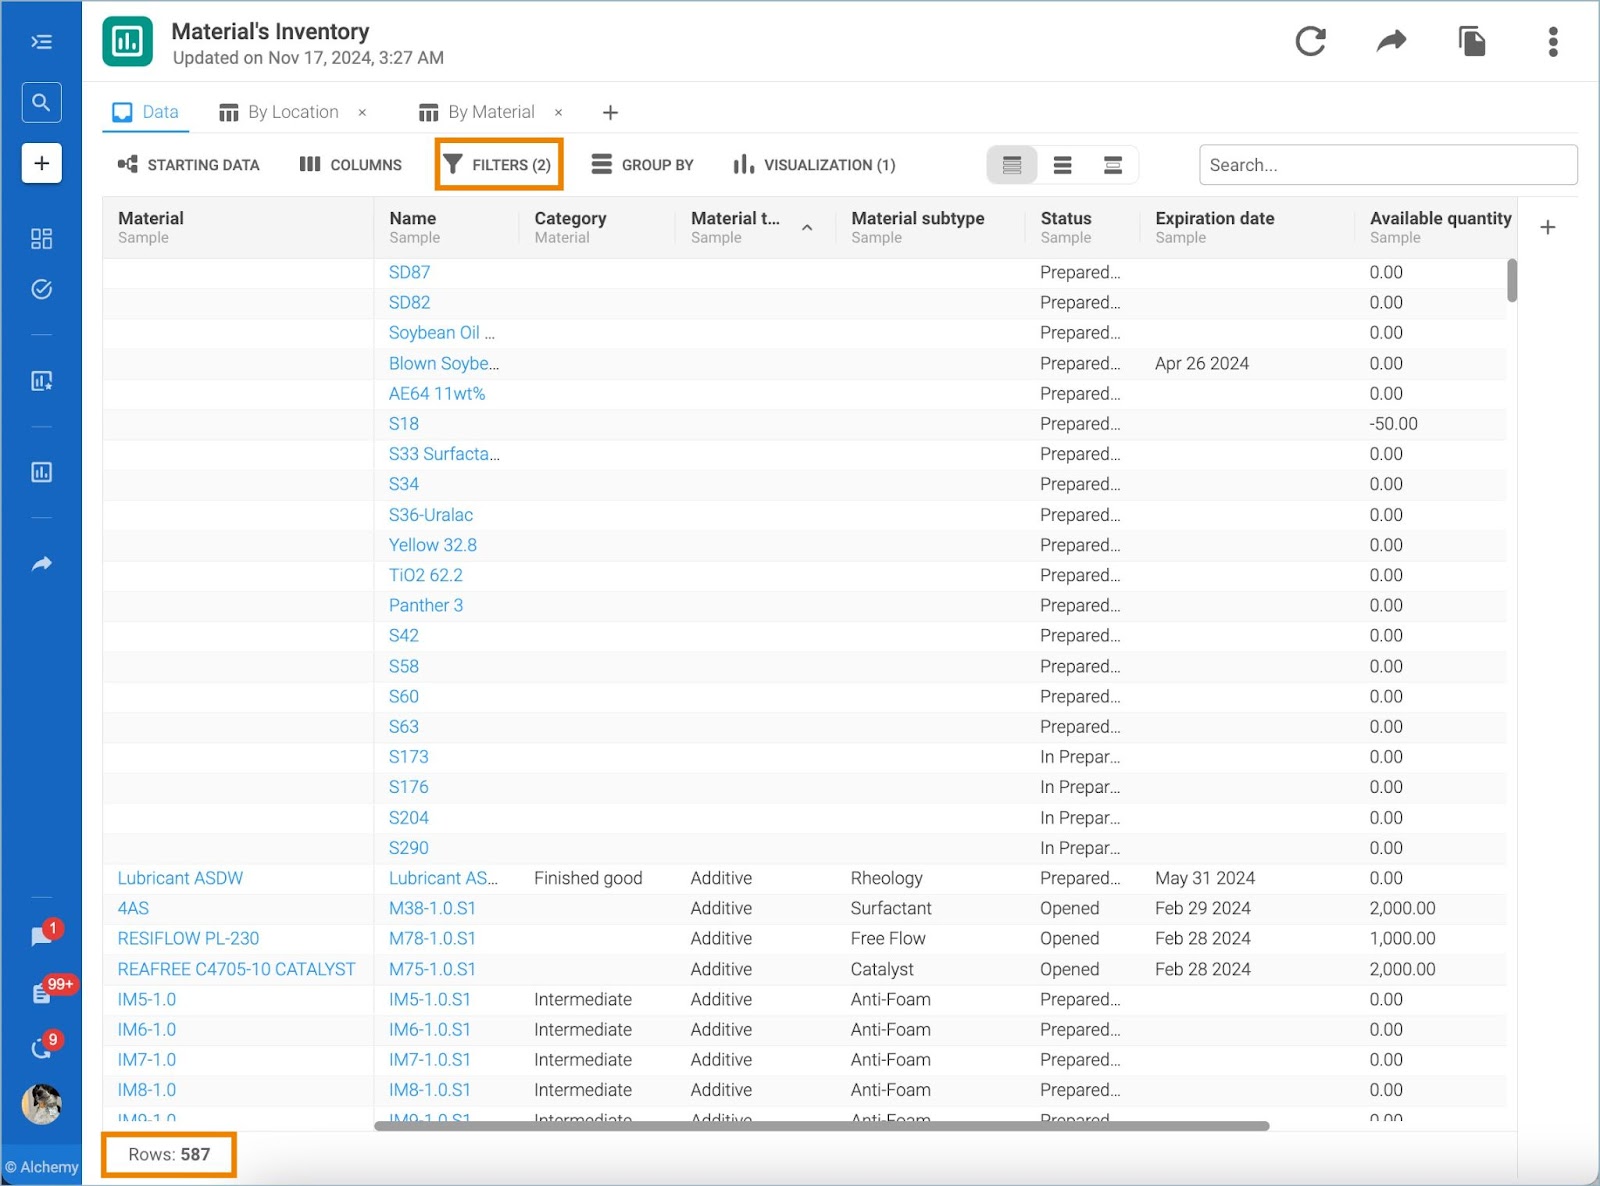
5. The number of applied filters for the View is displayed in parenthesis on the Filters tab. Once a filter is applied, the number of row results updates in the View as well.
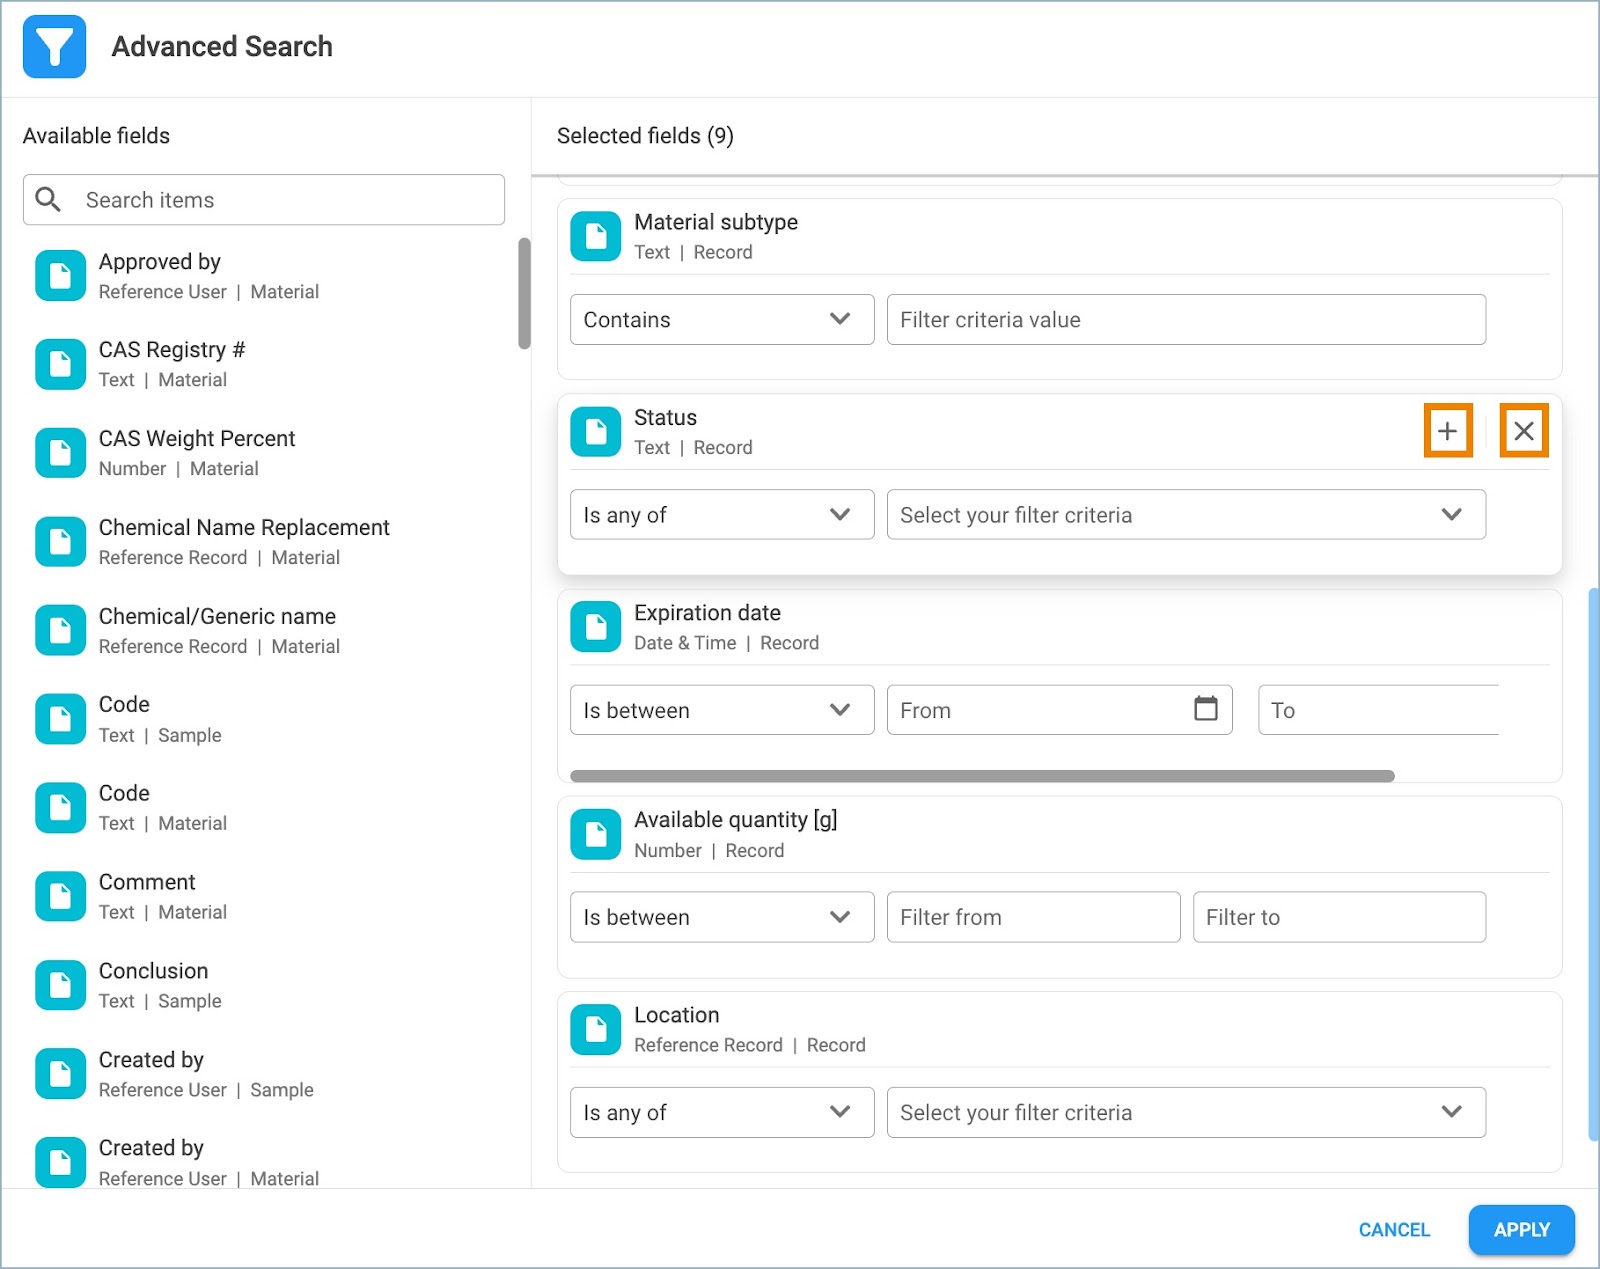
6. More filter criteria can be added to the same field. Hover over the field in Selected Fields and click on the + icon.
7. To remove a field from the Selected Fields section, hover over the unwanted field and Click the X icon.
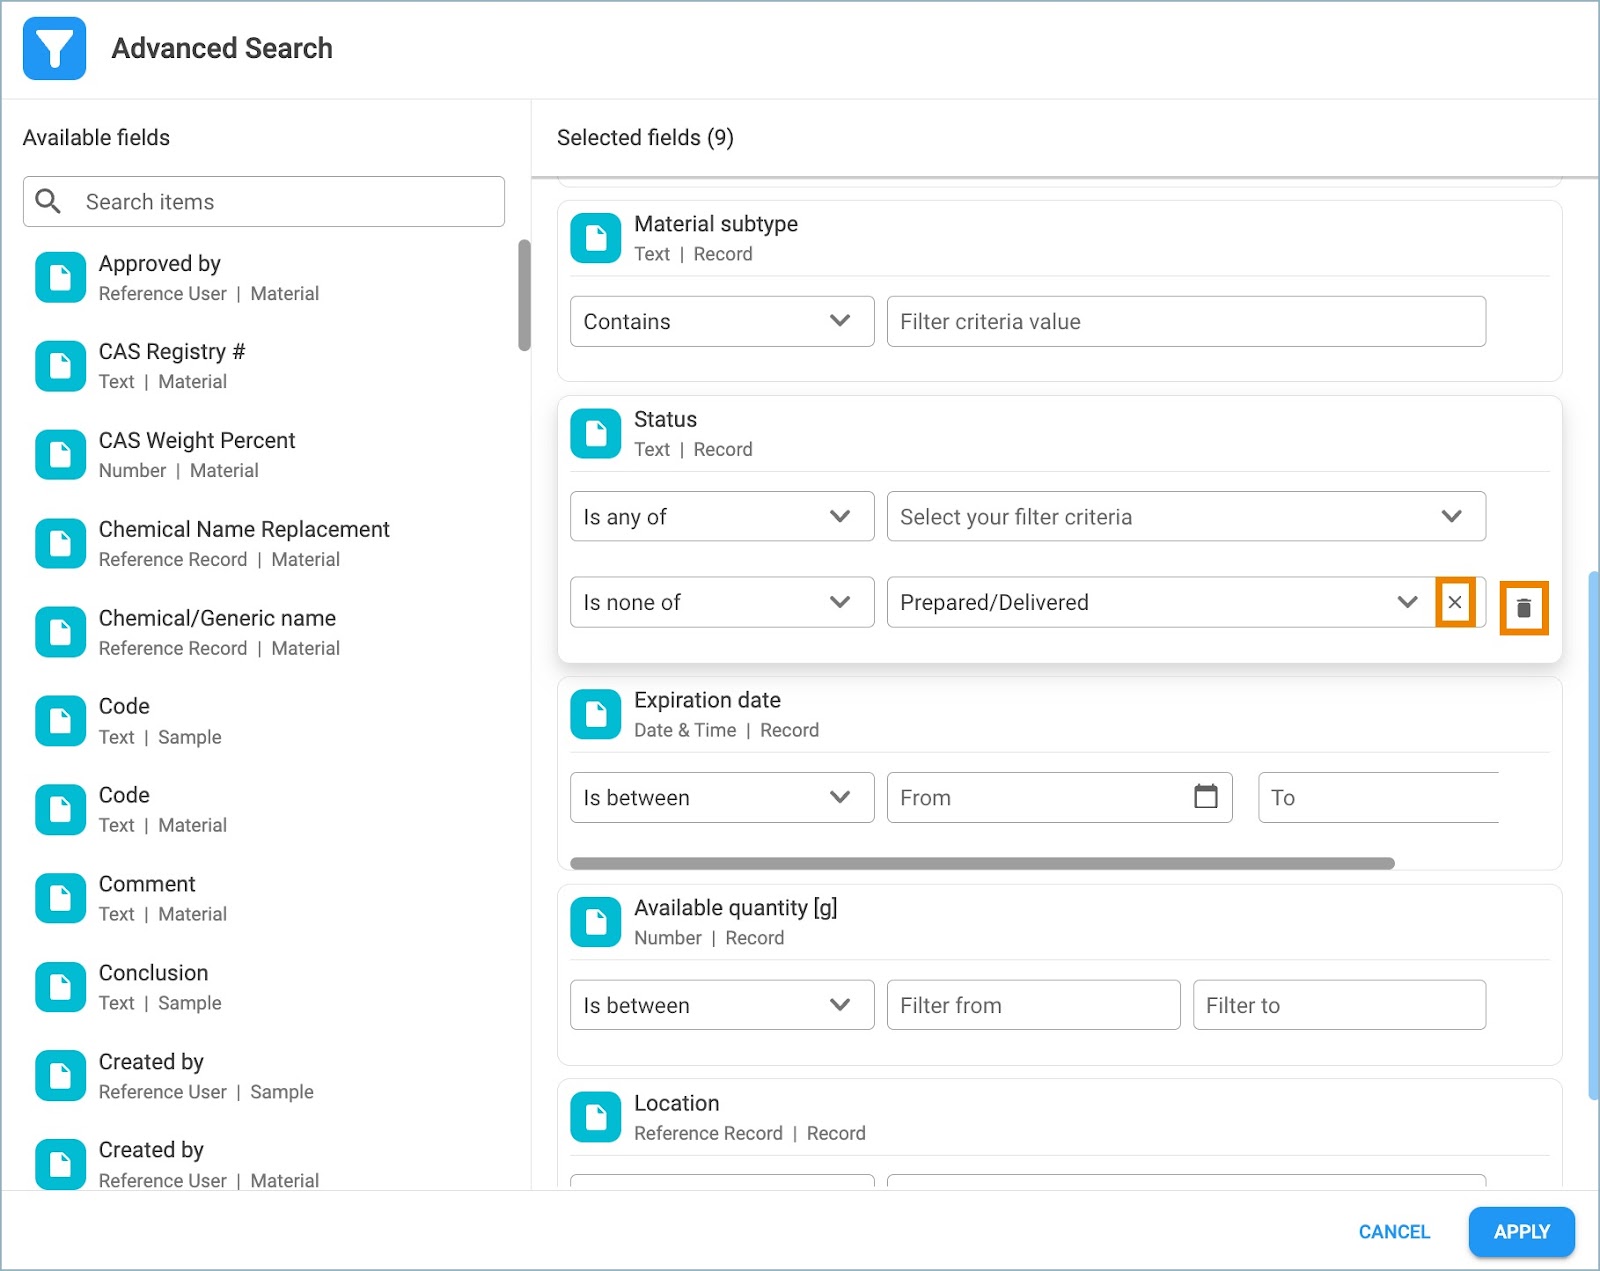
8. Applied filter criteria values can also be removed. Hover over the unwanted filter criteria value and click on the X icon.
9. To delete unwanted Filter criteria, hover over the unwanted filter criteria. Click the Delete icon that appears.